Showing posts with label A Season of Serenity series. Show all posts

Friday, December 23, 2011

Holiday Resources and Series Wrap-Up: A Season of Serenity (Now) at Home

Oh my sweet mercy, I can't believe that tomorrow is Christmas Eve! Hosting this series, A Season of Serenity (Now) at Home, has been so much fun. I wanted to take today to thank each blogger again, and also to share a few fun Christmas Pins from my Pinterest Page. It's never too late for a little Christmas Inspiration!

Here are a couple fab Pins I spotted this week:


Eye candy, right???

And these are the fabulous posts from the series, and links to the even more fabulous bloggers who shared them (Are they not the best looking people ever?!):


-Advent Calendar Craft Tutorial from Random Thoughts of a SUPERMOM
-How to Stay Joyful (and Sane) During the Holiday Season from Imparting Grace
-Sausage Stuffing Recipe
-Christmas Organizing from Organizing Made Fun
-Low Stress Holiday Party Tips from Centsational Girl
-Decorative Chalkboard Tin (Gift Idea)
-Vintage Silhouette Ornament Tutorial from Infarrantly Creative
-Holiday Style Guide from Michaela Noelle Designs
-Christmas Card Display from Honey We're Home
-Christmas Tinsel Garland Wreath
-Christmas Gift Wrap Embellishments from Ten June
-Affordable Tablescape Tips and Ideas from Courtney Out Loud

December has really flown by for me. I've certainly had a few melt-down moments (Christmas Tree Lights Drama, anyone?), but hosting this holiday series has been so helpful for me. Not only have I had a chance to learn some creative tips and tricks...I personally benefited from hosting some gracious and talented bloggers here. Knowing I didn't have to stress about coming up with new post material every single day took such a load off of my shoulders. I can say with complete certainty that this Christmas season has gone more smoothly because of it. Many, many thanks to you, Kelli, Richella, Becky, Kate, Beckie, Michaela, Megan, Michelle, and Courtney!

I know series and guest posts aren't always a hit with readers. Thank you, readers, for your patience with me as I took this month to enjoy some special holiday time with my family. I hope you enjoyed this series. Thanks to everyone of you who took the time to comment, Tweet, or FB the links.

Have a Merry Christmas, if I don't "see" you before then.

Thursday, December 22, 2011

Affordable Tablescape Tips and Ideas

I've seen a lot of frantic Tweets and Facebook status updates this week from people across the web who find themselves planning last minute holiday meals. Many of us (myself included) struggle with creative tablescapes that are both affordable and doable. I invited my fellow Centsational Girl Contributor, Courtney from Courtney Out Loudto put together some Tablescape Tips and Ideas.

Please welcome Courtney!
*********************************************

I think creating a beautiful table is part of the "gift" you are giving your guests at a meal. A wonderful tablescape enhances the mood as well as works to elevate the overall experience of the food being consumed. The tablescapes I do for myself and clients are meant to be dramatic but none of them are out of your reach.

Laying out a tablescape is very much like designing a room: you need a color story, strong foundational pieces as well as accessories and accents that support your overall theme. Here are some quick rules that I follow when putting together a tablescape in my home:

Think About What You Already Have: When I go shopping, I think about the decorations I already have when deciding what to purchase. Groupings of similar objects, whether they be by color, shape or material create a larger impact than a single object. Do you already have two glass candlesticks and see one on sale? Buy it, even if it doesn’t match! It will be worth the investment when are able to pick and choose from a variety of candlesticks of vary heights to create a layered look.
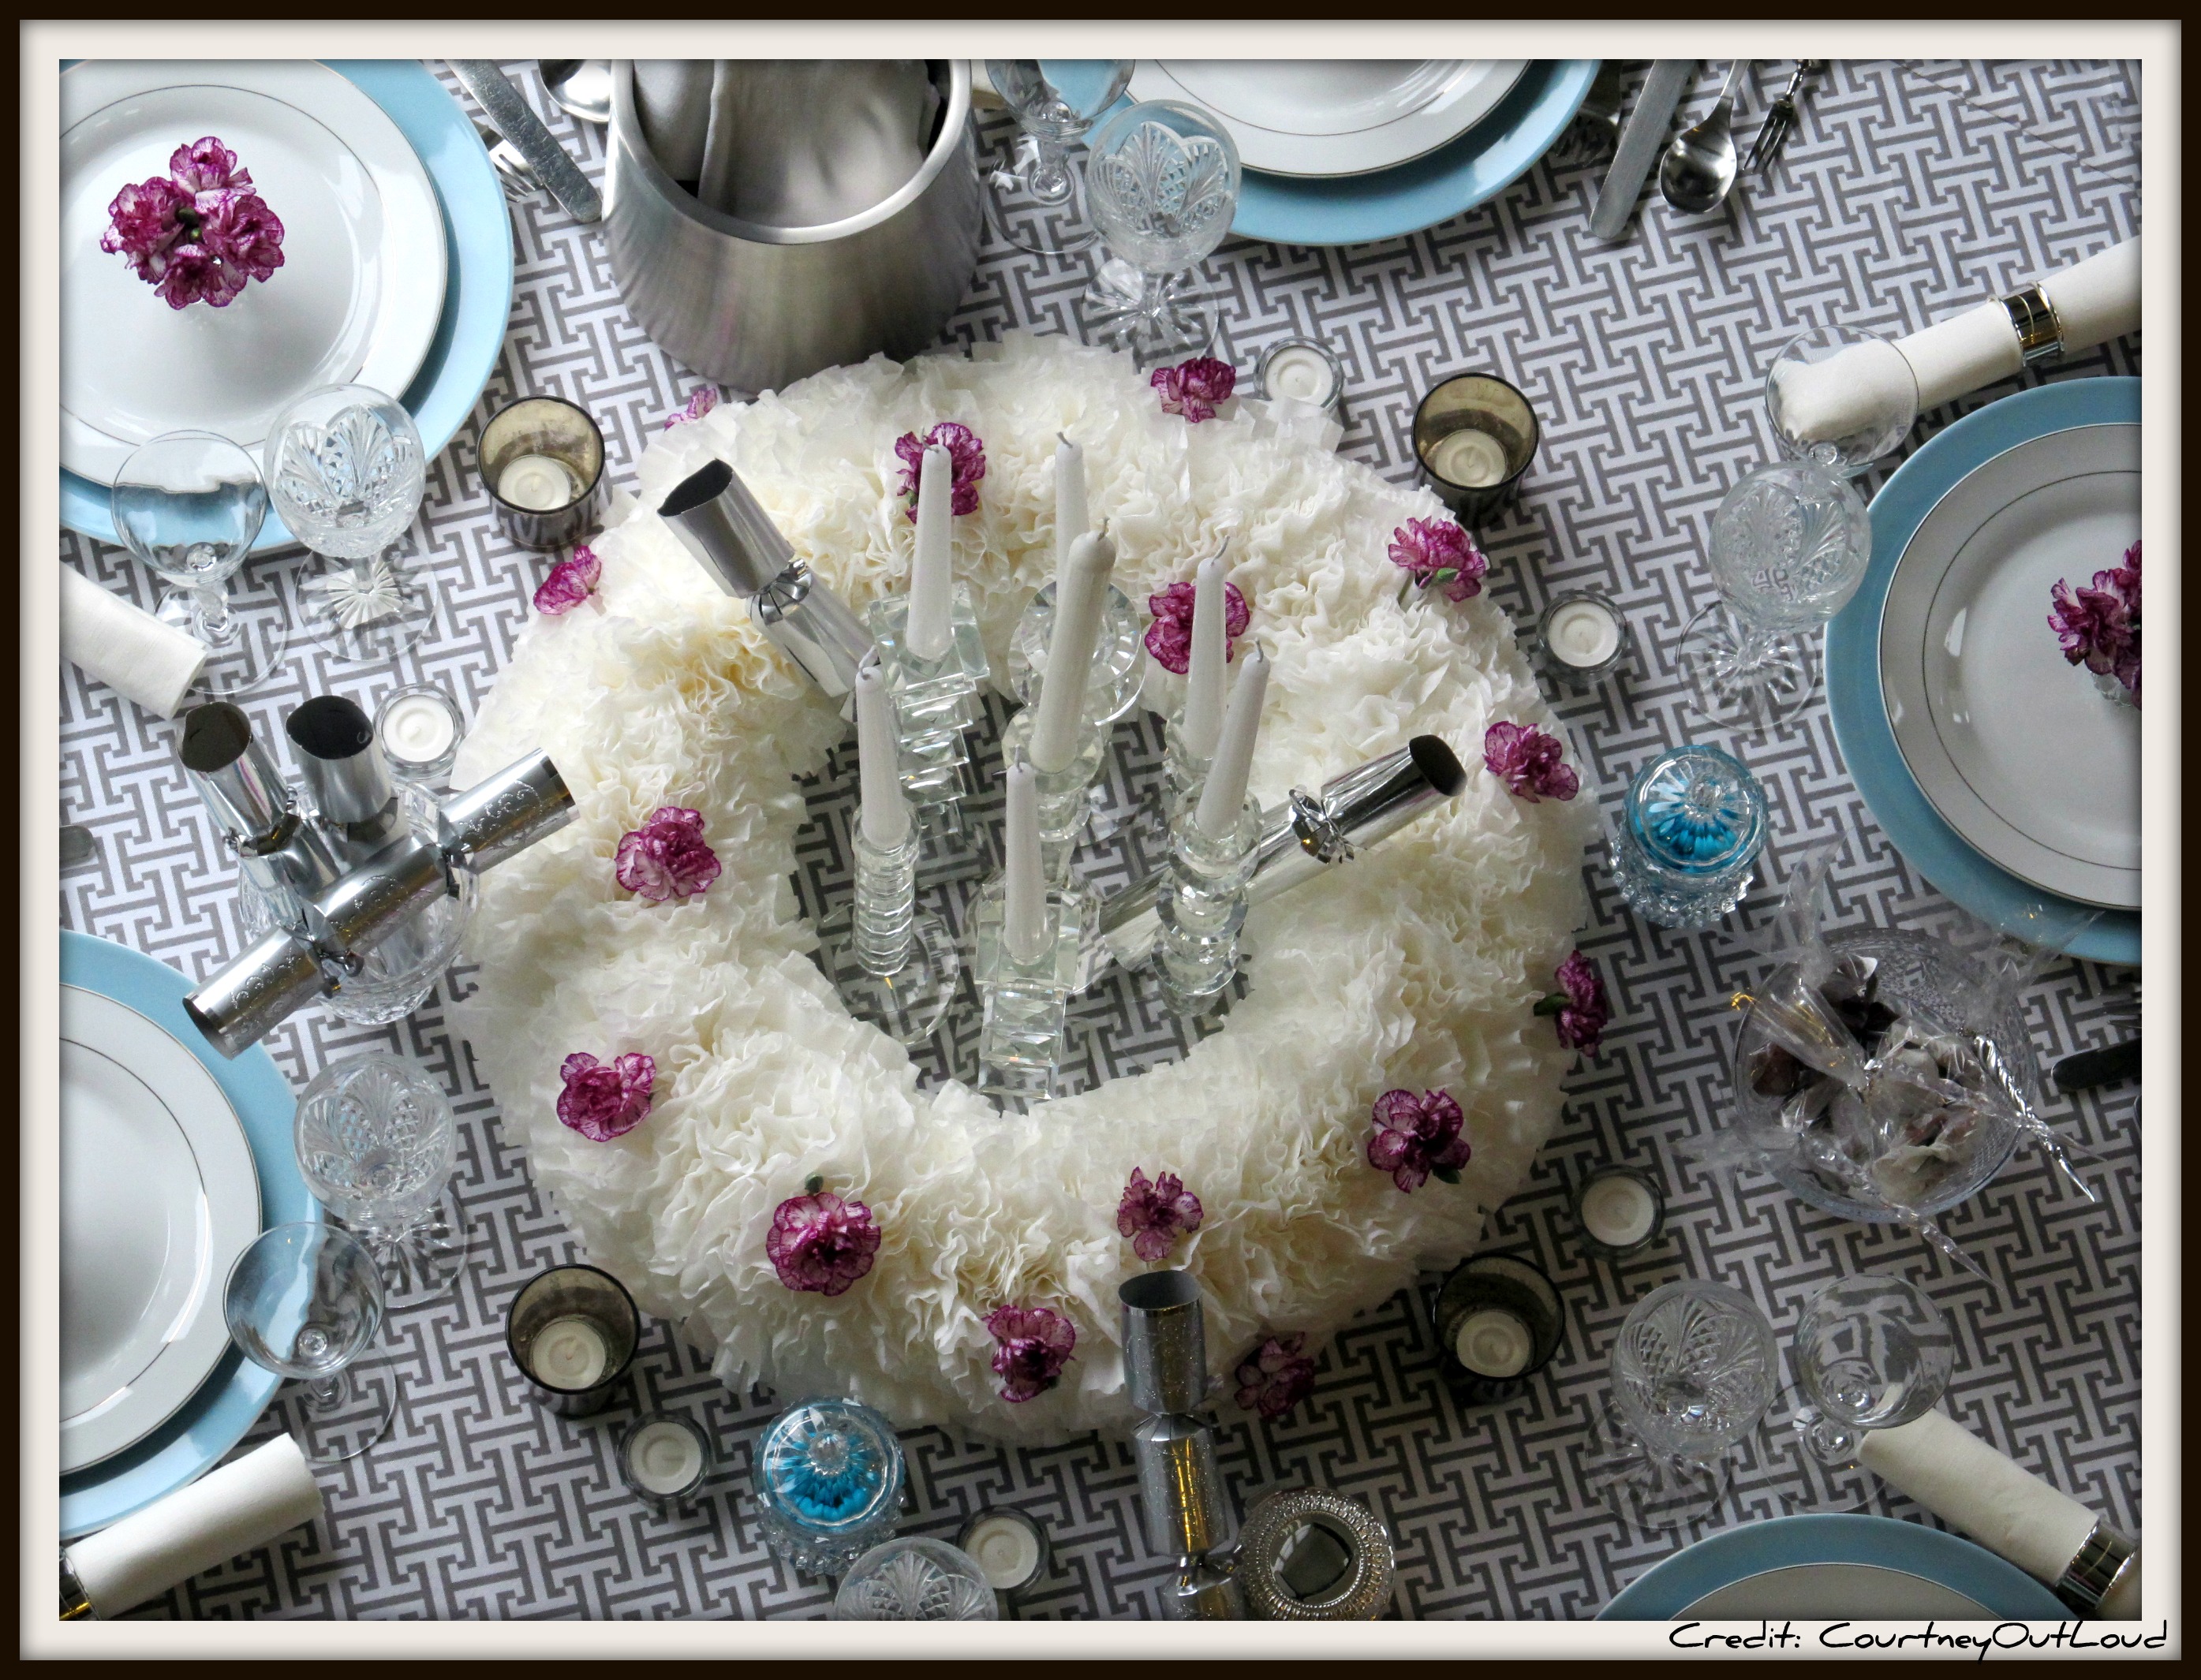


The crystal candlesticks I used in my New Year's Eve tablescape from last year were part of my hodge podge collection. Whenever I see one candlestick on sale, I pick it up and add it to the collection. When grouped together, they create a dynamic centerpiece.

Borrow From Your Momma: Don’t be above using other people’s stuff to create a show stopping table. Have you been coveting your sister’s Waterford glasses and have an important dinner coming up? Borrow them! No one has to know that they aren’t yours. Just remember that when you borrow someone’s precious and undoubtedly expensive table items, you incur the risk of breakage. So go by the rule, if you can’t afford to replace it, then you shouldn’t borrow it.
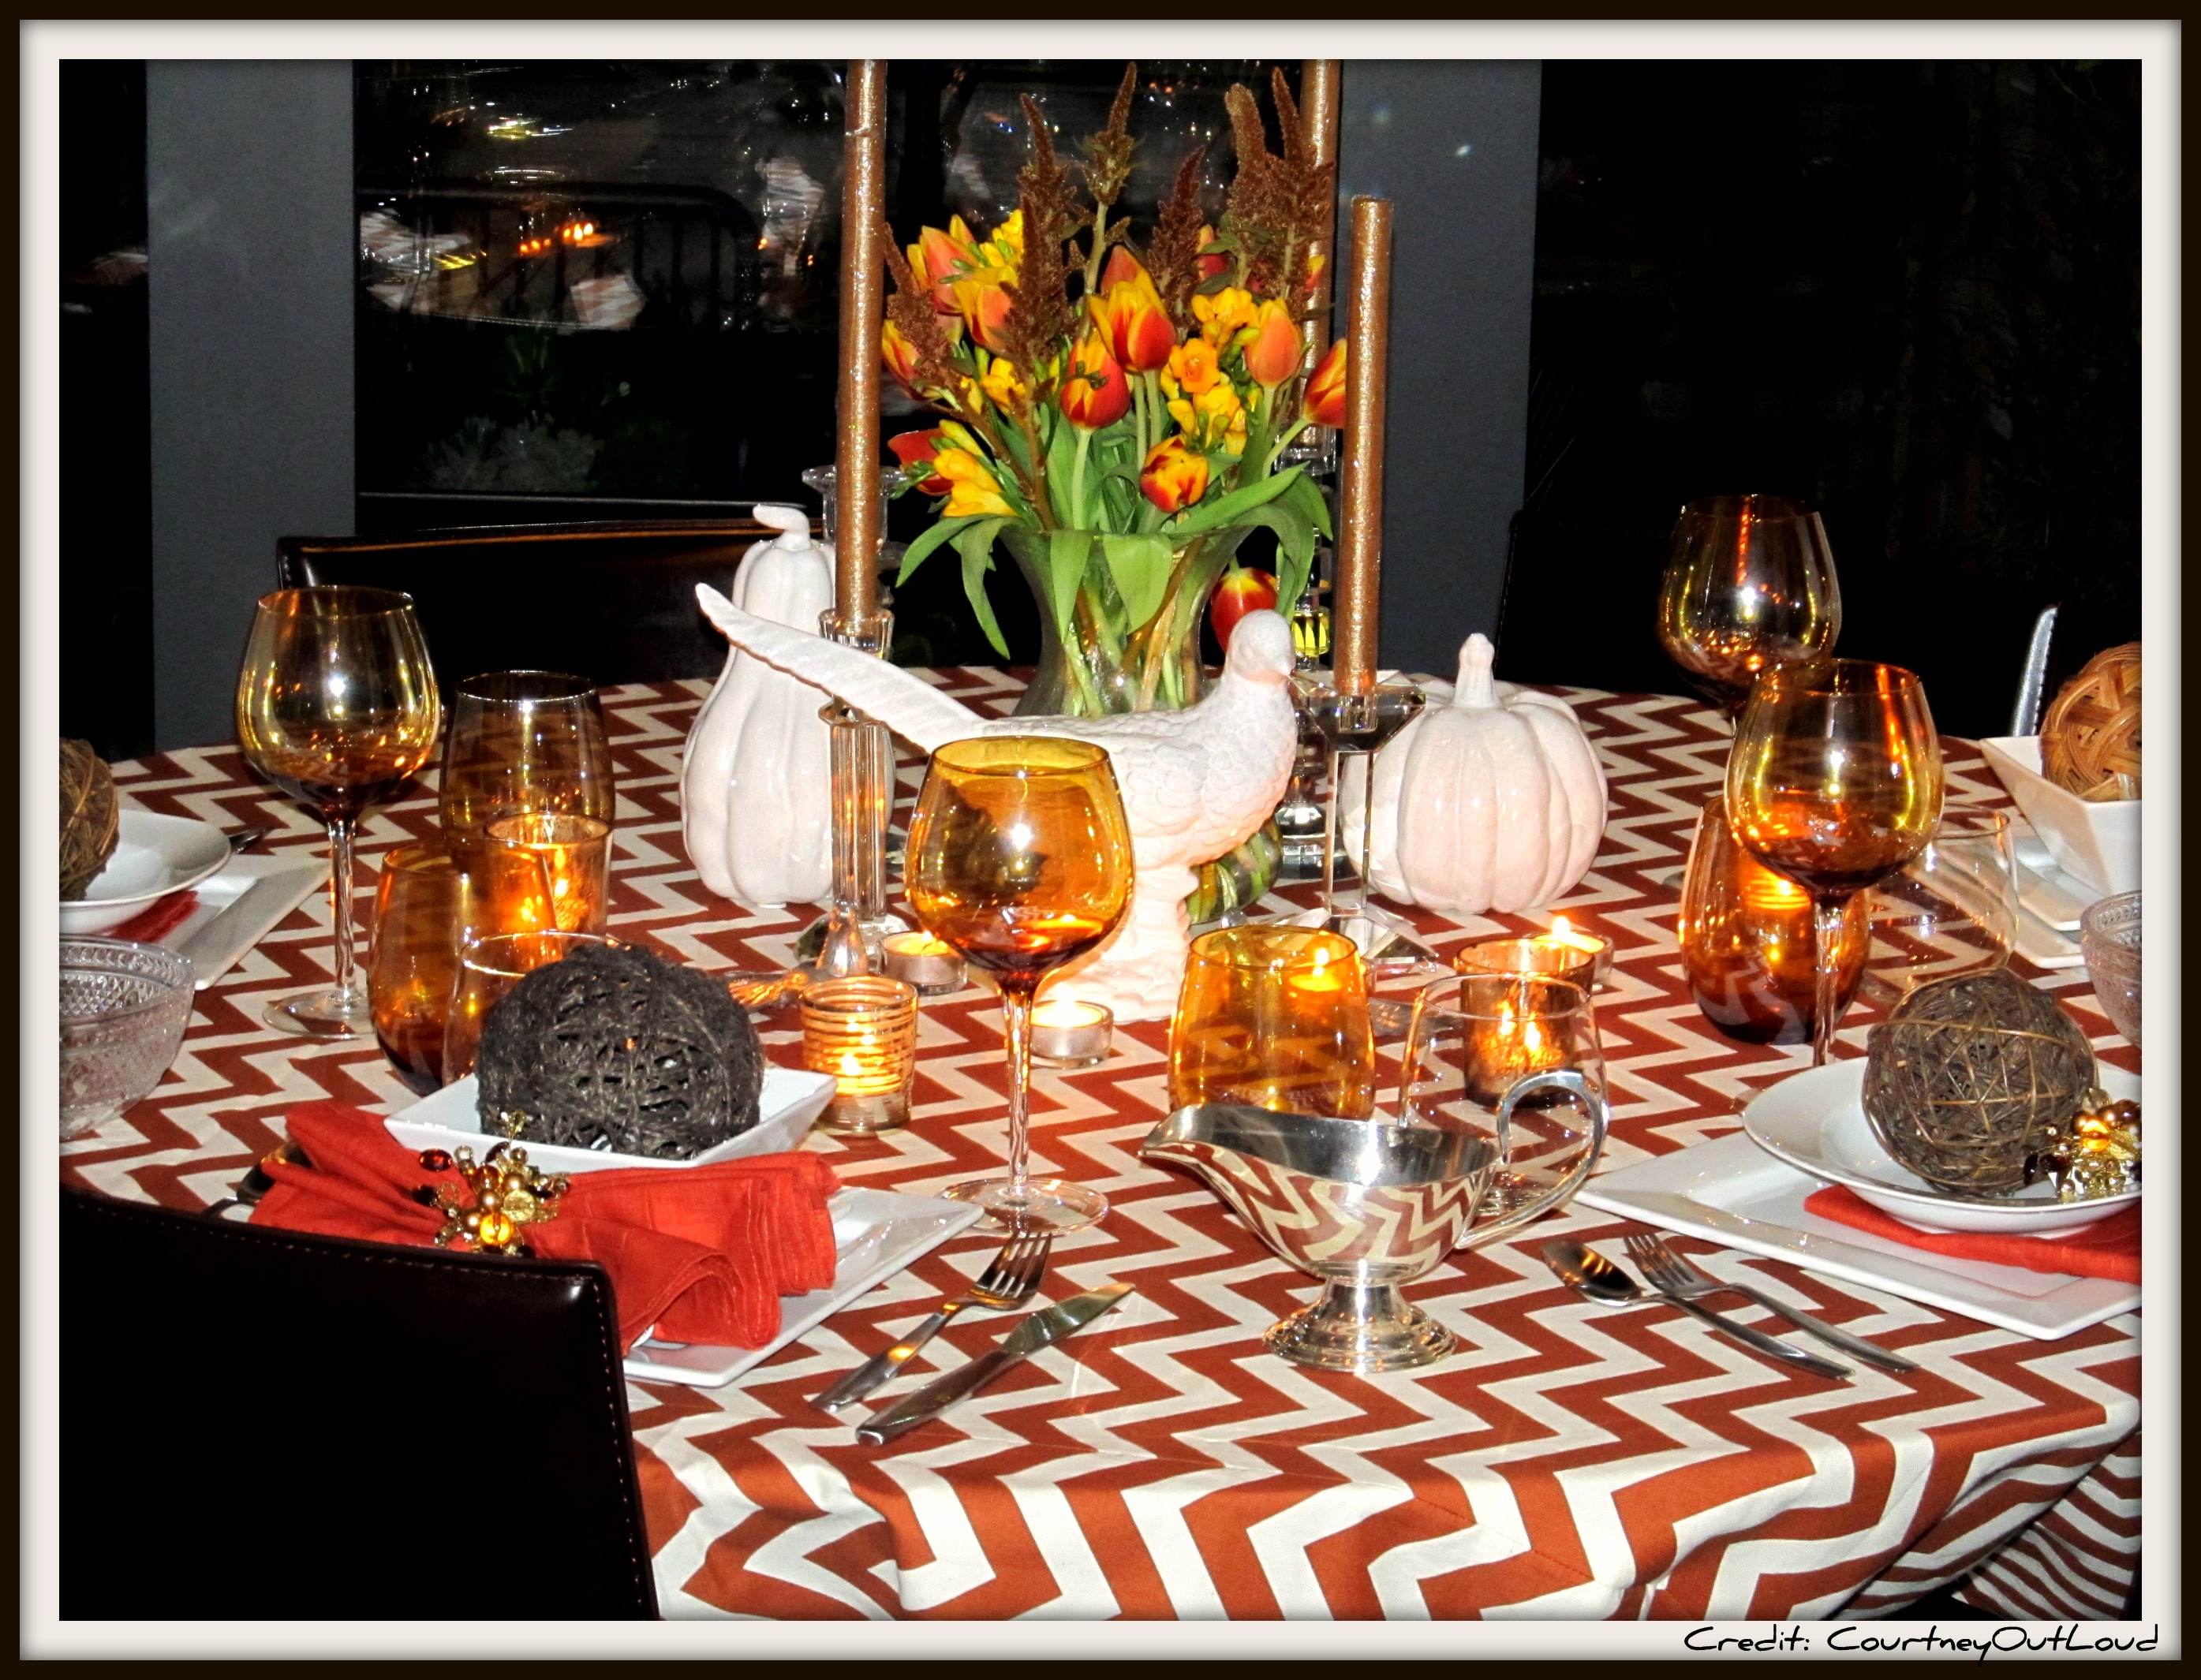


For my very first tablescape, I borrowed elements like the wicker balls from my friend because I didn't want to invest in something I was not going to use down the line. The wicker balls added a nice rustic touch to the table and cost me nothing but a slice of leftover pumpkin pie as a thank you.

It Doesn’t Have to Match: People get hung up on sets and I am here to tell you, get over it! You don’t need to have a matching set of anything to have a dynamo table. I tend to buy in sets of 2,3 or 6 when shopping for plates, glasses or table settings since the maximum amount of people my table holds is 6. By shopping in these increments, I can mix and match patterns to create interesting color, pattern and texture stories which look intentional. Second, if something breaks, it’s no biggie because I am not worried about it being a set; it’s just now an accent piece in my growing collection.


Notice that nothing in this tablescape matches, not even the chairs, but everything works together. The trick is making sure that the colors are complimentary and the shapes are similar. In doing so, you fool the eye to see unity and harmony where there is none.

Floral Arrangements Aren’t Central: I tend to shy away from expensive centerpieces for my table settings. Aside from the expense, I never know what to do with it the next day so I opt often to use house plants. Yup – house plants. However, that doesn’t mean simply throwing your fern into the center of the table and calling it a day. Layer in found objects from around your home and maybe one type of flower in low vases to give the centerpiece depth and interest. Personally, I tend to have orchids around my home so I just swap out their pots for pretty bowls or glass candle votives, add some rocks and moss – BAM instant centerpiece.
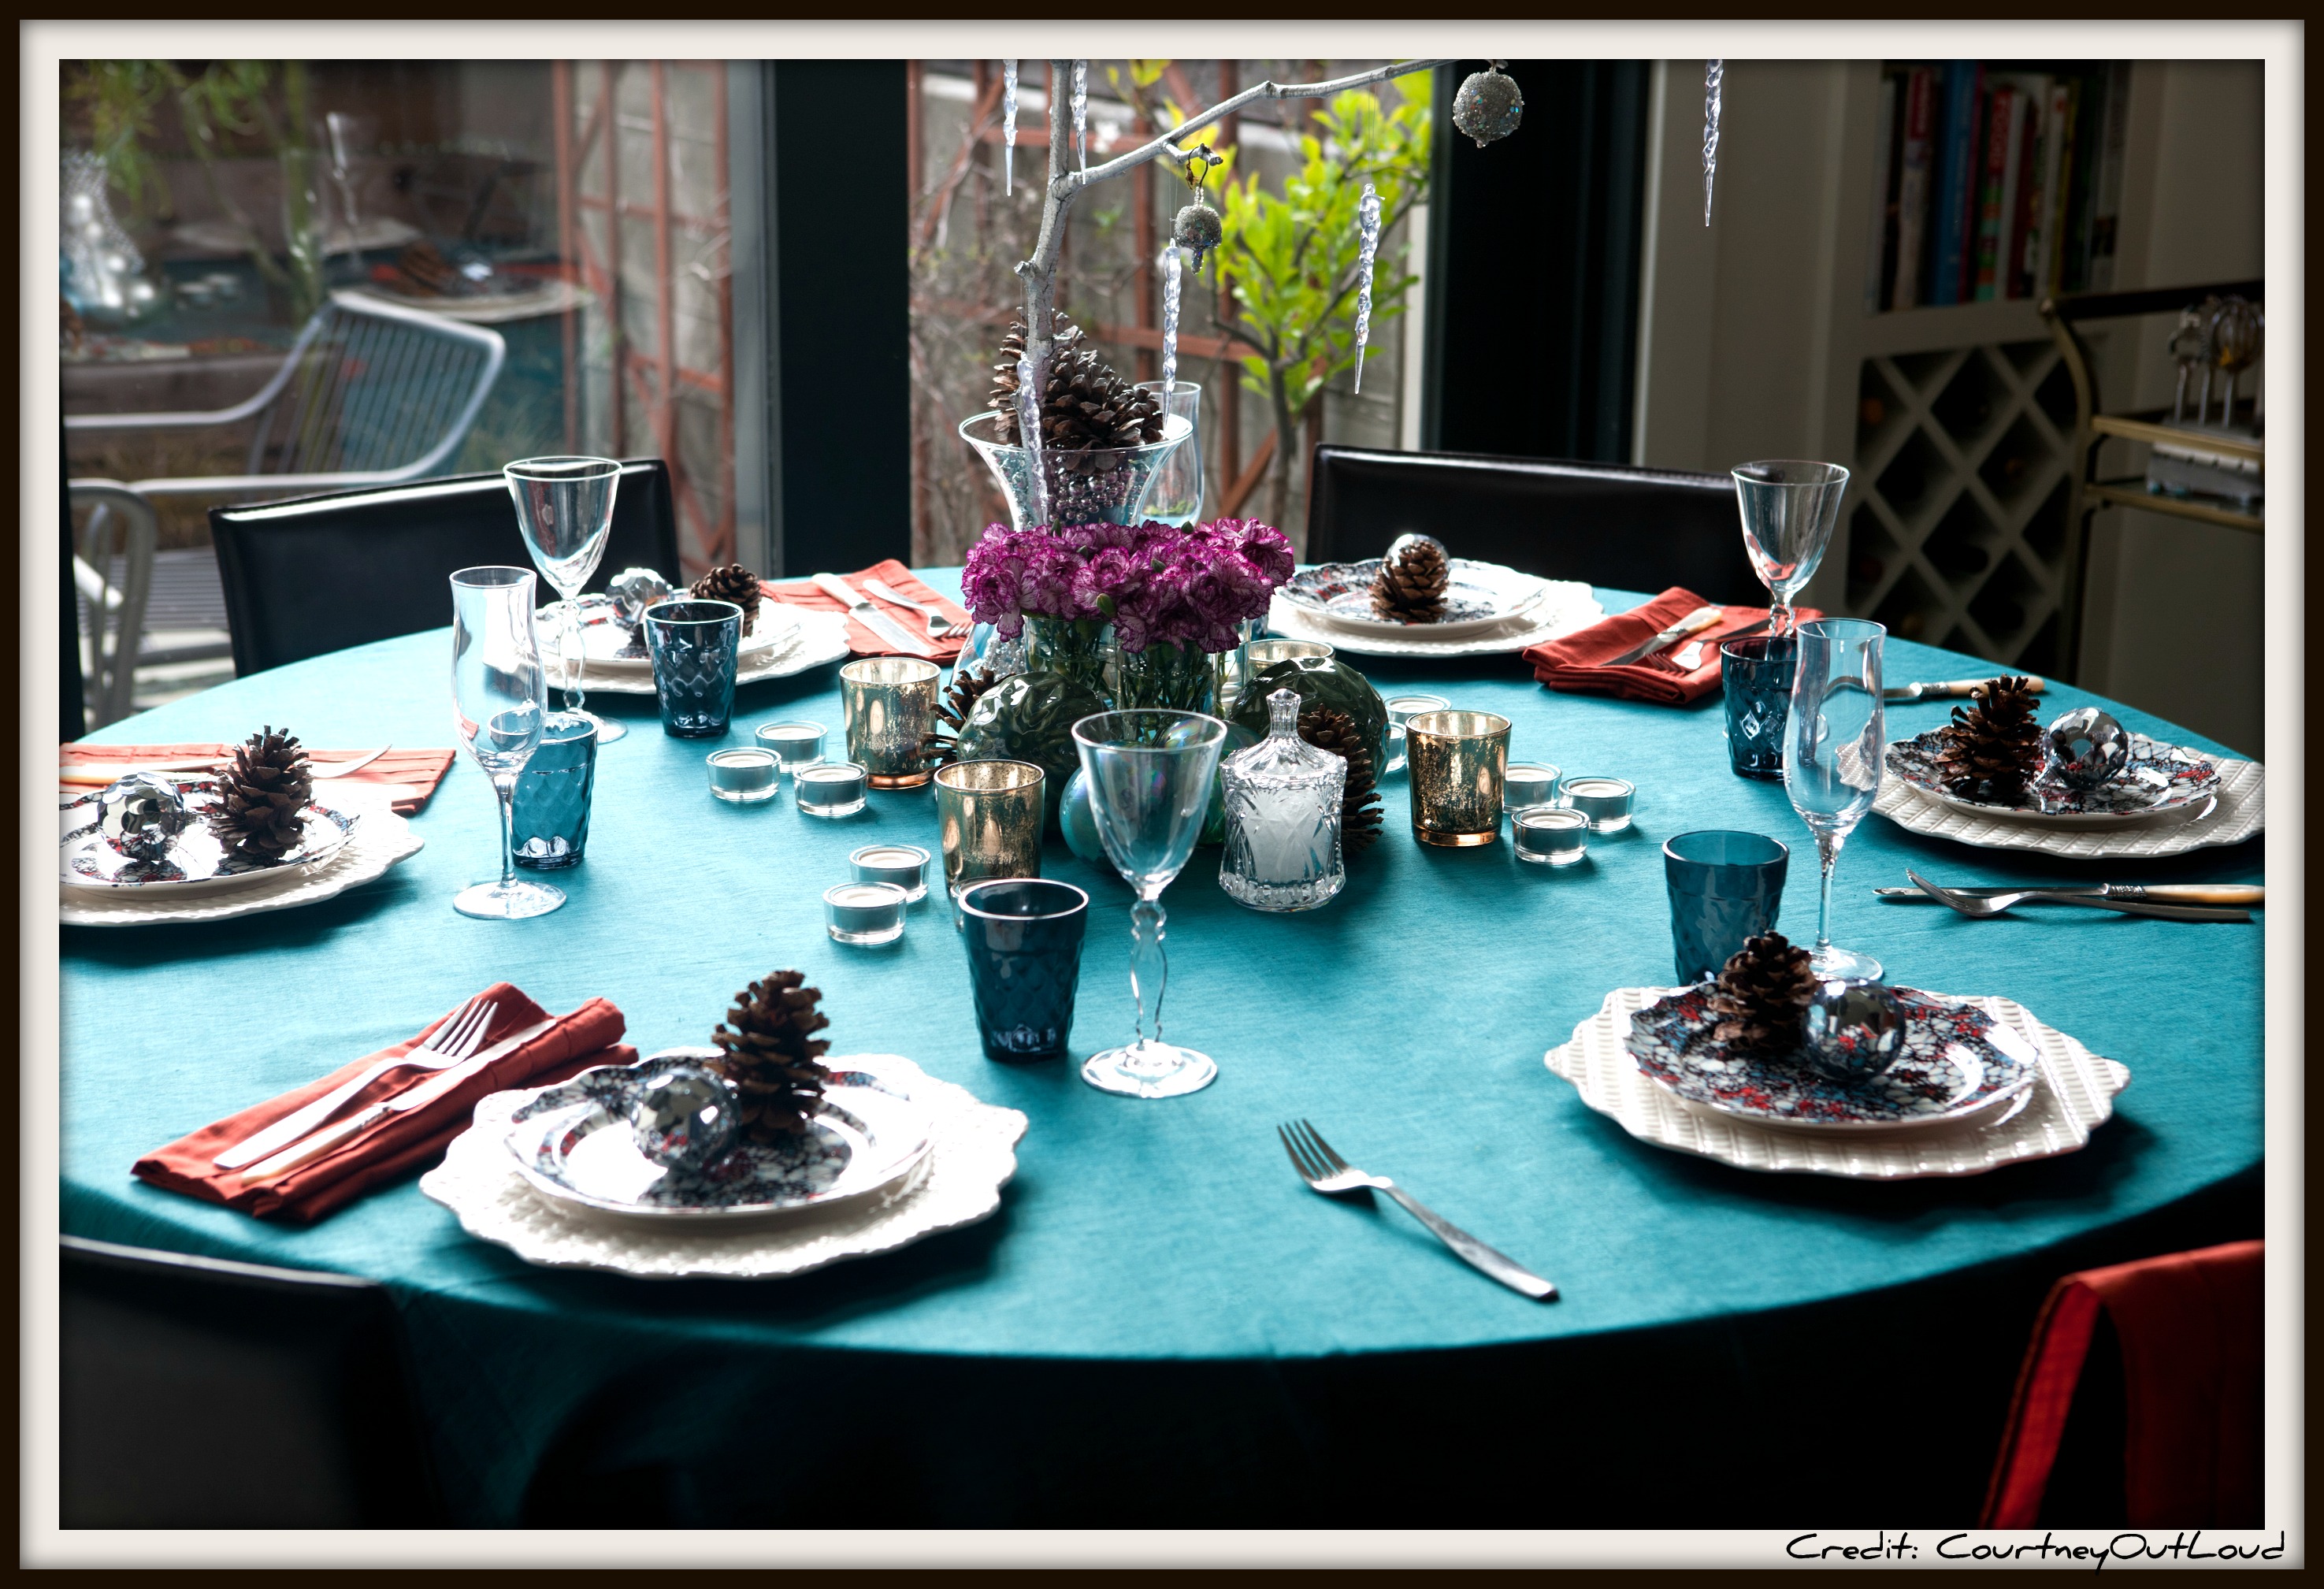


The only flowers on this table are carnations I picked up at the local grocery store on sale. The story is being told by the deep color of the table linens and dishware while the flowers are merely an accessory.

Decorating a table doesn't need to be a crazy process . Simply use what you have, borrow from others when you need more, repurpose from other areas of your home and don't over think flower arrangements to have a stress-free and beautiful holiday.

Again, thanks to Amanda for inviting me over to the blog and sharing the love.

Happy Holidays!!!!!
*********************************************

Isn't Courtney's work stunning? I love the mix of color, pattern, and texture. It is such a relief to hear that beautiful tablescapes don't need to be pricey. You still have plenty of time to put together a lovely table to impress your guests!

An extra big thank you to Courtney for putting together this post for me. If you haven't stopped by Courtney Out Loud yet, you need to make it a stop on your daily tour of the blogosphere. Courtney is witty, stylish, and thrifty. I can't really like of a better combination! His blog is brimming with insightful tips and beautifully photographed projects. Please tell him I sent you!

*NOTE: There will be no Weekend Bloggy Reading link party this weekend. I hope we can all take the weekend to enjoy this beautiful Christmas season with family and friends! The link party will resume next Friday, December 30th, as usual!

Wednesday, December 21, 2011

Adding Flair to Your Christmas Gift Wrap

Only a few days left until Christmas! I know a lot of busy ladies out there are furiously attempting to wrap gifts before/after work, in between kids' naps or school schedules. I love, love, love the look of beautifully coordinated Christmas Gift Wrapping. I invited Michelle from Ten June over to chat about how to make your gifts really stand out against the sparkle of your tree. As my Season of Serenity (Now) at Home series is winding down, I know you'll enjoy another day of tips and tricks designed to bring some extra Serenity to your home this Christmas!


Take it away, Michelle!
*****************************************************


Hello hello! I'm Michelle from Ten June, Amanda's blog friend and co-contributor over at Centsational Girl. I'm pretty jazzed to be chatting up all things holiday today... after all, it is the most wonderful time of the year! Baked goods galore, mistletoe, Santa, candy canes, sparkling lights, presents, hot chocolate, family gatherings, the food at family gatherings... can you tell I like to eat my way through the holidays? : )

What I don't like to do through the holidays is stress.

It's a fabulous time of year and the last thing that any of us needs to be doing is worrying and stressing! We need to save that time for eating chocolate candy shaped like Santa and his reindeers, riiiiight?


One way that I de-stress before the holiday season is to organize my gift giving. I always seem to run crazy with the forgotten, last minute gift... whether it's for the neighbor, a co-worker, a hostess gift or even that one time I forgot a gift for little cousin Suzy (shhh, don't tell her I said that!). To avoid the forgotten gift, I stock up on fun favors- wine, snack spreads or any other little trinkets that you find and can share as a small gift.

But the magic lies in the wrapping, right?

So my big secret? I keep a few fail-proof but fancy gift wrapping methods on hand to dress up those last minute gifts. The gifts look cute, I'm not stressed and everybody is happy!

Here are three of my favorite gift wrap tips to stay stress-free for the holidays!


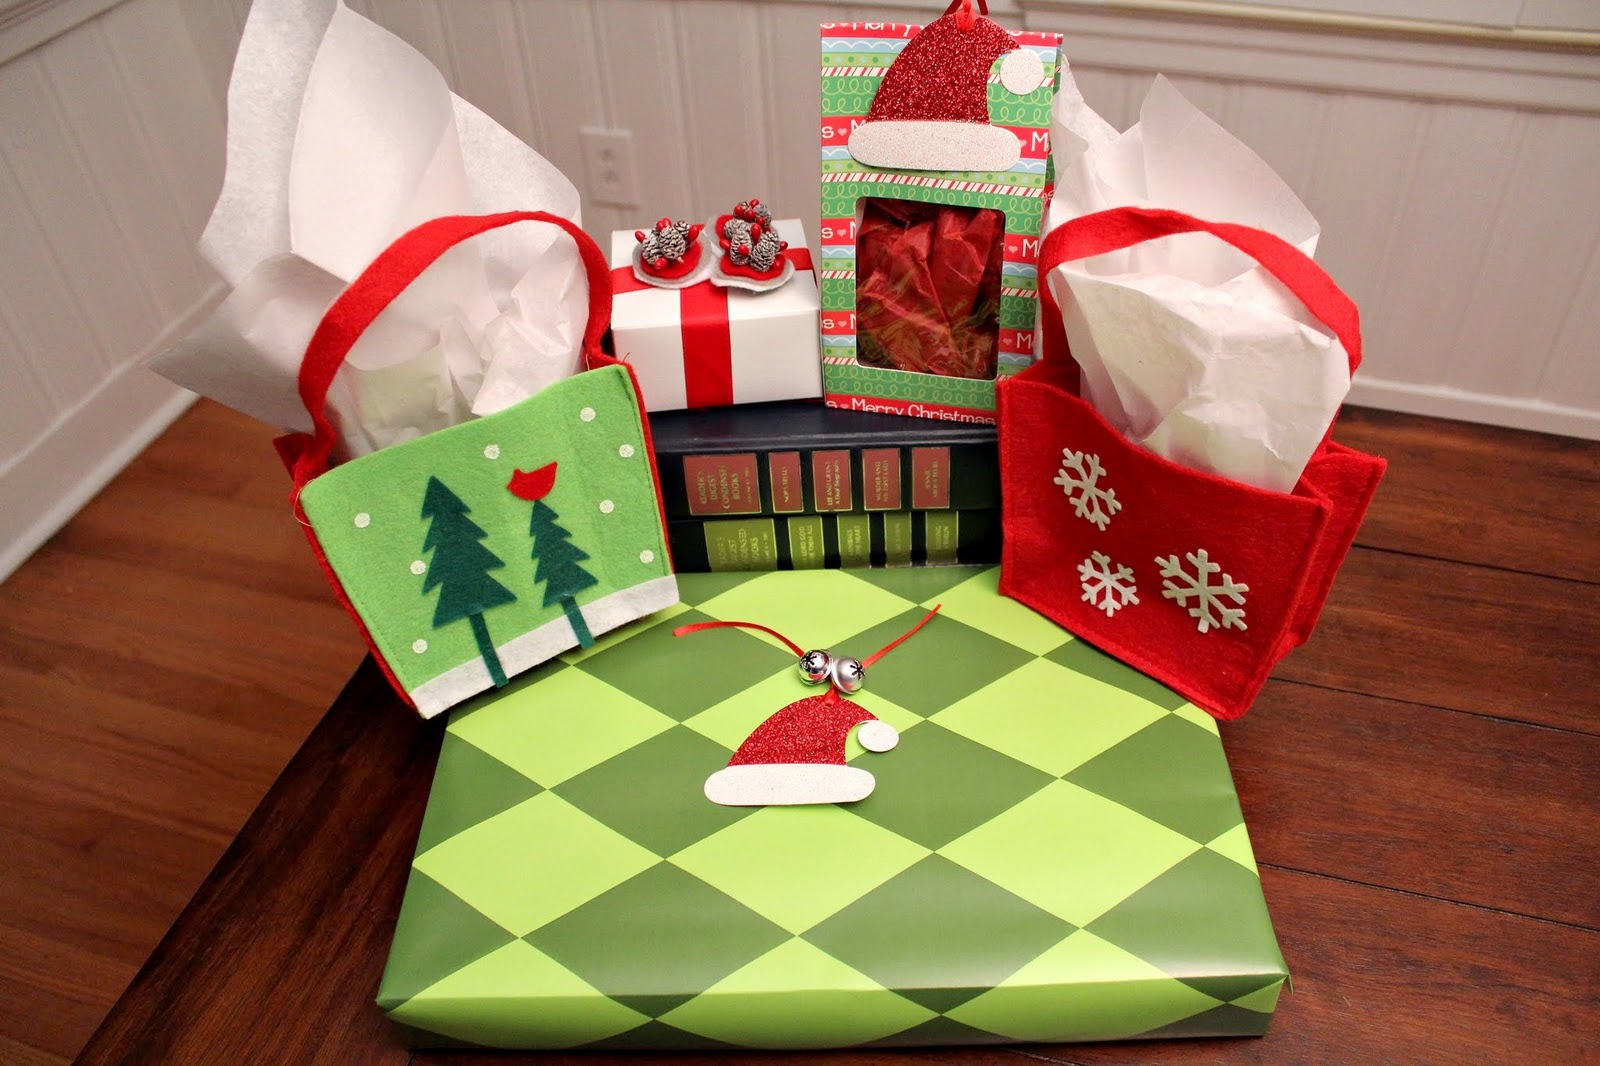
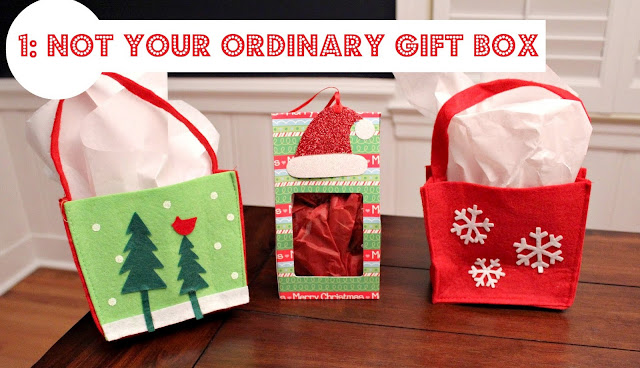
Don't think that you have to wrap everything in your standard gift box. Think outside of the box (pun intended!) and use easy gift packages like these adorable little felt pails or these fun windowpane boxes. I found the windowpane boxes  at Hobby Lobby last year and they've become my favorite boxes to wrap up the homemade chocolate peppermint cookies that I make every year!


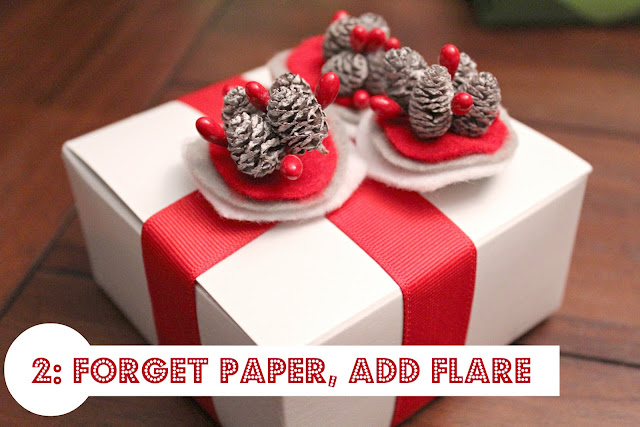
What if you don't even have time to wrap up your plain jane white gift box? Keep a stash of premade gift toppings ready to tape on top of a box so you can hit the road without even wrapping!

These little felt pinecone pieces are adorable and really easy to make. Simply cut felt into circles, thread with the wired pinecone decor (found at Hobby Lobby) and voila! Your gift went from frumpy to fabulous.


When in doubt, add some jingle jangle and a little sparkle. I've never met a grinch who doesn't smile when they hear jingle bells ring. They add an element of magic to any package!

So there you have it... a few gift-wrapping words of wisdom. I hope all of you have a stress-free and fabulous holiday season. Thanks so much for having me, Amanda!


**************************************************
So, great minds think alike because I picked up that same gorgeous green wrapping paper at Hobby Lobby back in the Fall. Isn't the glittery Santa hat adorable?

Thank you so much, Michelle, for showing us how to wrap in style! Love the little pinecones, don't you?

If you aren't reading Ten June, please stop by today! Michelle has a great sense of style...her blog is filled with some pretty fab room makeovers. Tell her I sent you!


Tuesday, December 20, 2011

Christmas Tinsel Garland Wreath (Dollar Tree Decor)

Don't we all love to make a good impression with curb appeal? What better way to greet your holiday guests than with a festive wreath? My own Christmas wreath was starting to look pretty faded, so I decided to make a new one using items from the local Dollar Tree store. This Christmas Garland Wreath cost just $5 to make, and takes less than 10 minutes to put together!

Here's what you need to make your own wreath:


  • Wreath form (straw or foam...straw was all my store had on hand)
  • Spray paint
  • 3 or 4 Christmas tinsel garlands 
  • Scissors
  • Wide ribbon
  • Masking Tape
*Before you start wrapping your tinsel, you may want to spray paint your wreath form. I painted mine white so that any parts showing through would blend in with our door! I used cheap WM spray paint that I had on hand and one quick coat was all it took.

Instructions:

1. Loop one end of your garland through the wreath form.
2. Secure the end with a knot.
3. Tightly wrap your tinsel garland around and around the wreath form, being careful not to leave any gaps. 
4. Tuck the other end of the garland under the wrapped portion and secure the wreath to your door following my Wreath Hanging Tutorial (excellent if you own a metal door like I do)

My mom kept making comments about how the wreath needed a little something extra so to keep her quiet and to stop the voices in my head, I added that Dollar Tree "Ho Ho Ho" glitter sign to the wreath with some florist's wire.

Easy!

If you are drawn to glitter and shiny things like I am, this is the wreath for you...especially if you're on the hunt for something last minute. I love simple, quick crafts like this--talk about keeping your sanity levels stable!

If you're looking for more creative tips and tricks to keep some Serenity in your life this holiday season, please click over and check out the other links in my Christmas series, A Season of Serenity (Now) at Home. There are all sorts of great posts on organizing, crafts, fashion, party planning, and more!

Monday, December 19, 2011

DIY Christmas and Holiday Card Display

Fun Christmas Craft post today! My Season of Serenity (Now) at Home series is still going strong, and will wrap up later this week. Today's creative crafty tutorial comes from Megan, who blogs at Honey We're Home. Megan has a wonderfully simple, yet pretty way for you to organize those Christmas cards the mailman keeps bringing to your door.

Here's Megan!
*************************************

Ahhh, the Christmas shopping is D-O-N-E! I am really pleased with what we chose for our friends and family and I cannot wait to give them their gifts!!  I selected most of the ‘girl’ gifts and my husband picked out things for the guys- after all, he’s the expert;)  I’m working on wrapping the gifts and making personalized gift tags that I’ll show you later in the week.


Today, I’m sharing how we are displaying our holiday cards this year:  

image


I used clothespins, red and white twine, and command hooks to create the card holder.
image

image

image


Then I decorated the clothespins with craft paper, ribbon, and bows using tape.
image

image

image

image

image

image

image


Glittered green bows hide the command hooks:

image

Did you get your shopping done too?  Every year I say I’m going to finish sooner, but I never do.  Next year?? Ha!
*********************************************************

Thanks, Megan, for dropping by to show us how we can organize and display our cards. I have a small pile on my sideboard that needs a place of honor.

Please be sure to visit Megan at Honey We're Home. Her blog is an inspiring spot for all things design. Don't forget to tell her I sent you!

I can't believe Christmas will be here this weekend! Are you ready? I have some major baking to do later in the week, and definitely some cleaning, but most of the shopping is done--hurray!

Thursday, December 15, 2011

Your Holiday Style Guide for 2011

Fun Fashion post today!! Am I the only one who frets when it comes to holiday fashion? Occasionally, I spend so much time getting the kids to look nice that when it's my turn to dress, I end up just tossing on whatever's in my closet out of sheer frustration. I knew I wanted to include a Fashion post in my ongoing Season of Serenity (Now) at Home series. I also knew I needed to call in an expert to help with this topic...Please help me welcome Michaela from Michaela Noelle Designs. She has a beautiful Holiday Style Guide for us: something to appeal to women of all shapes and sizes!

So many women worry about what to wear at various holiday events, but shopping should be fun--not stress-inducing.

Take it away, Michaela!
*************************************
Hello there, Serenity Now readers! I'm Michaela and blog over at Michaela Noelle Designs. I'm an interior design major and love houses, color, art, pattern, and well designed spaces. I also adore fashion, hair, and all things glam, which is why I'm here today!  The lovely Amanda has asked me to put together a style guide for your Holiday Season. Let's begin...

One of the first things you do for the Holidays is pick out your tree with the fam. At this time, most of the country is pretty chilly, so here's an idea of what to wear on your outing:


A cute striped shirt, fur vest {think faux fur, girls!}, dark wash jeans and boots that keep your feet warm!

Next up, some ideas for the Christmas party you're attending!


Have fun dressing up this season with a little black dress, festive green chiffon, or some metallic! A fit that flatters everyone is an empire waisted dress, or a cut that hits you at your smallest part-- your waist! Don't be afraid to show it off (:  Accessories and great shoes always vamp up any look.

Don't know what to put on after you wake up, open stockings with the kids, and spend the morning in your PJ's? Here are some ideas:


Arrive at the family's house in a cozy poncho or tunic. A dark wash of straight legged jeans flatters everyone! Metallic shoes and a festive green scarf put the finishing touch on the look.

Feeling a little retro chic? Go for the polka dot dress and simple black flats. A pair of tights under the dress would be great, too!

For the girly girl inside everyone: a textured lace skirt with blush pink top and sparkly ballet flats. Add a touch of green in accessories, and your all Christmas Day ready!

Here are a few general tips:
*Blush pink and mint green are the new red and green of the season.
*Mix metallics. Silver and gold look great together!
*Dark wash jeans are great for fancier occasions and are also universally more flattering.
*Defining the smallest part of your body will make you look {and feel!} like a million bucks.
*Accessorize with scarves, hats, layers, and fun jewelry.
*Take advantage of all the good food around the Holidays...even if it means you have to undo the top button on your jeans! (;

Most of all, enjoy time with your families and try not to stress! After all, this is the season for giving.  But no one said we can't look good while doin' it!

Thanks for having me, Amanda! I just loved taking over Serenity Now for the day. Come visit me any time, readers (:
xoxo
***********************************************

I want to pull that green dress right off the page, and those silver "Christmas Day" flats are to die for! Thank you, thank you, Michaela, for the reminder that being busy during the holidays is no excuse to walk around like I got dressed in the dark. In a cardboard box.

I have a dinner to go to with T tomorrow night, and this post gave me some ideas! You might not be the size you wish you were (welcome to my world), but there are so many silhouettes in this style guide that can be implemented for different sizes. Look at colors, patterns, or textures. Have fun finding your perfect holiday look!

If you haven't visited Michaela Noelle Designs, you must! Michaela shares all sorts of lovely design and fashion oriented posts. Eye candy of the best kind. Please be sure to tell her I sent you!


I hope you'll come back tomorrow to link up YOUR best post of the week to Weekend Bloggy Reading. Recipes, crafts, home decor, book reviews, funny stories, you name it. Come prepared to showcase your blog and find some great weekend reads.
Weekend Bloggy Reading


Related Posts Plugin for WordPress, Blogger...