


Today is the 9th anniversary of the day T and I were married!
We're not doing anything too wild today because I fly out for Orlando tomorrow, but I asked Laurel from Ducks in a Row to share a fun project with you all. I enjoy stopping by Laurel's blog for glimpses of her lovely homelife, thoughts on homemaking, and fun activities.
Hope you'll leave her some comment love here for this fabulous project, and please be sure to stop by her blog as well! Take it away, Laurel....
************************
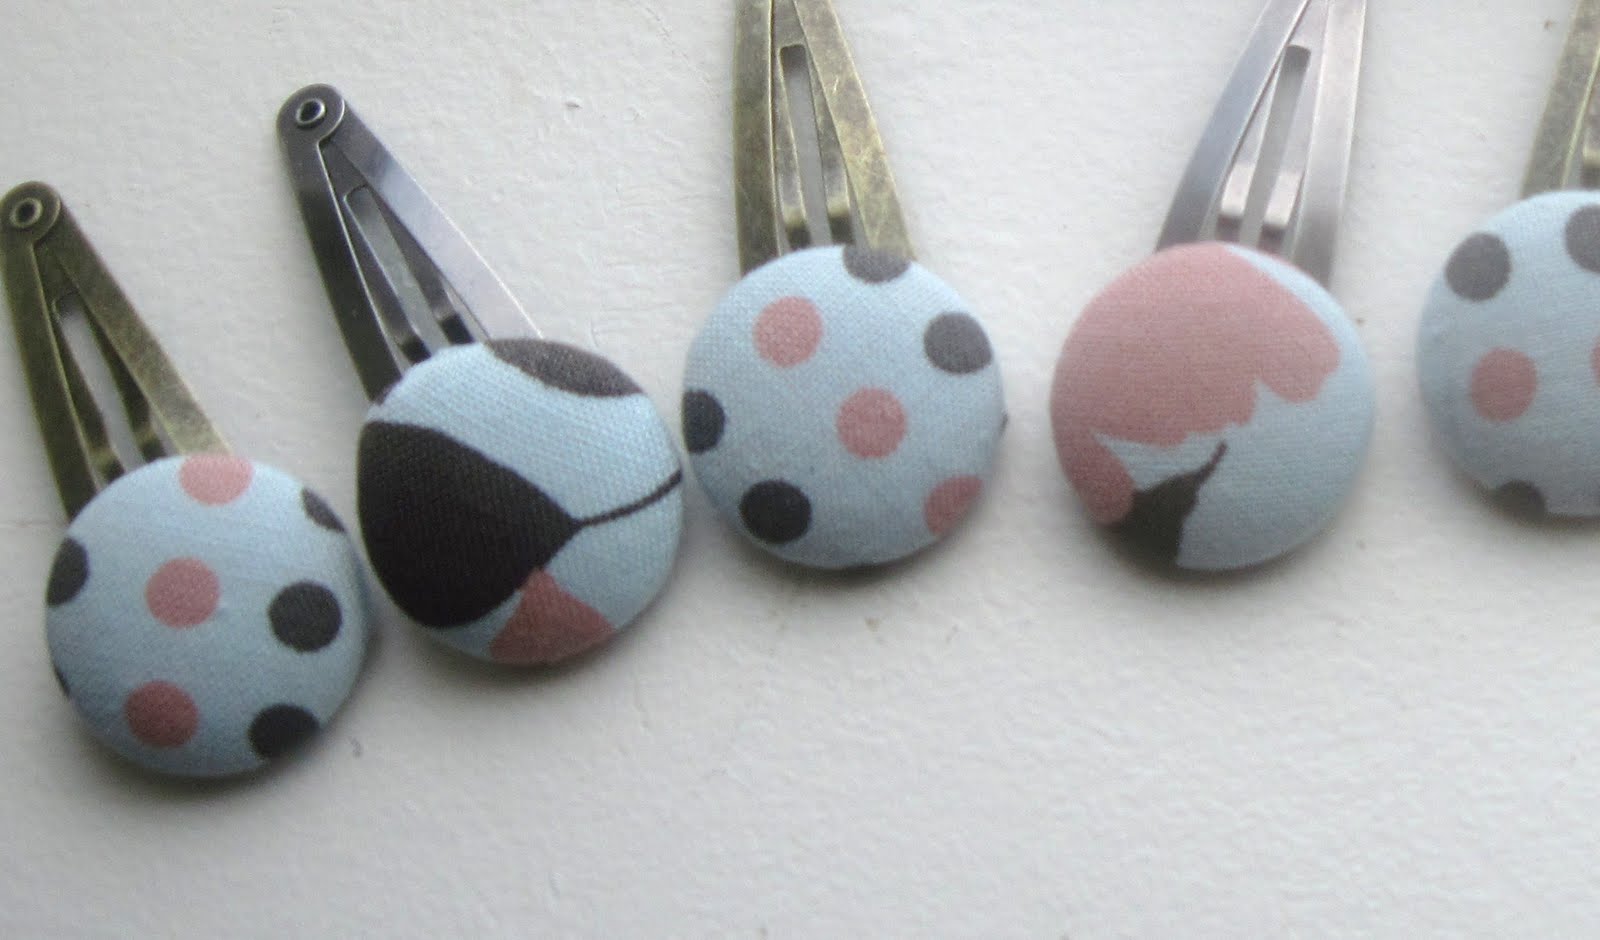
I have a daughter who is too old for bows and ribbons. Yes, the day has come. I think these button clips are a great older option for girls hair. They are really easy to make - follow along.

You need:
*Fabric scraps
*Craft wire
*Clip

OK - with your pliers, grab the shank and remove it. (ooh, blurry picture, quick let's move on!)

Next, cut a couple of inches of your craft wire.

and bend it in half.

Slide this wire through the bottom of the clip, and through the bottom of the button (Be careful when you remove the metal shank that you notice what side it was on. You want that side facing the clip).

Twist the wire, trim it, and smash it down so it as flat as you can get it.


Grab your fabric scrap and the button cover kit. I only use the white plastic part.

Lay your fabric, right side down in the white thing (I'm sure it has a name, but I will call it the white thing) and put the top of the button over it. I make sure I line it up so I get part of the fabric that I like. I've done this before and ended up covering the button in the empty spaces instead of the pattern - whoops.

Trim the fabric. If you have too much fabric, it's hard to push the back on. If you have too little, the edges pop out. There is a pattern on the back of the button package.

Put the clip/bottom of the button on, fold the fabric in, and push. There are pretty clear instructions on the back of the button package. I can usually push hard enough with my fingers. You can kind of feel it snap in place. If it doesn't, the button will just fall apart - so push until everything is nice and neat.

Remove your clip from the white thing and admire.

Cute cute cute. We've done a variation on an elastic instead of a clip, and they are darling. I'm just a tad bit clumsy using those elastics. Just saying.
Make a slew of these - they're fast AND cute, it's a winning combination!

I had a blast preparing for this and thinking of all of you reading this! Come pay me a visit over at Ducks in a Row. I share my organizing tips, sewing projects, our never ending home projects, some recipes - you know, a little of this and a little of that!
Thank you, Laurel! I can't wait to make some of these for my girlies. Y'all stop back in tomorrow for an awesome Giveaway from The Shabby Chic Cottage.
Have a lovely day!


How cute! I love these! :-)
ReplyDeleteThose are as cute as a button! Love this project!
ReplyDeleteThose button clips are just adorable!! Thanks for the tutorial!!♥
ReplyDeleteHappy Anniversary Amanda! Those clips are too cute...I actually think I have all the stuff to make some in my craft room!
ReplyDeleteHow cool!!! I love these...may try them out with my 15 yr old daughter who is always trying to keep the hair out of her eyes!
ReplyDeleteP.S....Happy Anniversary Amanda!!! Have fun in Orlando tomorrow!!
I LOVE these! No glue gun involved.
ReplyDelete-Mama E
These are wonderful Laura!! Perfect idea!!
ReplyDeleteAnd a happy anniversary Amanda. Hope you have a fabulous celebration!
Hugs
SueAnn
Cute! Love those! I thought they were just hot glued.
ReplyDeleteHappy Anniversary Amanda and T!!!
Cute cute!!! Love these :)
ReplyDeleteThose are so cute! Happy Anniversary! Mine is tomorrow!
ReplyDeleteHappy Anniversary! :) Thanks for sharing this tutorial, I love making cute things for my girls' hair, and they would LOVE these!!
ReplyDeleteMissed "chatting" with you this past month, but I'm glad to be back to blogging now! Hope to catch up soon! (I've got a giveaway going on now, btw, if you want to check it out!)
Blessings,
Stacey
Very cute! I just made a button ponytail holder. I hadn't thought of doing clips.
ReplyDeleteThese are adorable. I wonder if I'm too old for the button clips?
ReplyDeleteSo so cute! I need to make some of those for my girls before school starts. Love them!!
ReplyDeleteSo cute Laurel! And happy Anniversary Amanda!
XOXO
jen
How cute those are, Amanda!!! You're so smart! And Happy Anniv!
ReplyDeleteSuzanne
Happy Anniversary!! So cool ours are so close together!
ReplyDeleteHappy Anniversary!! Wishng you plenty more.
ReplyDeleteCute project.
I'm going to keep this in mind for when I have that little girl!!
ReplyDeletebmkkdiv3, buy vimax pills
ReplyDeleteI'm very thrilled you took the time and said that!!!
ReplyDeleteErik
aig health insurance