Tuesday, February 18, 2014

DIY Mini Chevron Chalkboard {Craft Tutorial}

I don't know about you, but I have been in a crafty mood lately. Unfortunately, I've had zero time to craft or decorate over the past few months, but it doesn't stop me from looking at cute ideas online! Today, I'm happy to share the blog with Bonnie and Trish from Uncommon Designs! They have an adorable DIY Mini Chevron Chalkboard to show off.
DIY_Mini_Chevron_Chalkboard_UncommonDesigns

*****************************
Hey Y'all! We are Trish and Bonnie, and we blog over at Uncommon Designs. We are so happy to be guest posting today at Serenity Now for sweet Amanda, as she enjoys some snuggle time with her new little one.

We love a simple project and this one is just that! My daughter was wanting to spruce up her room a bit, and add some touches of turquoise and chevron. In addition, she is all about chalkboards. 

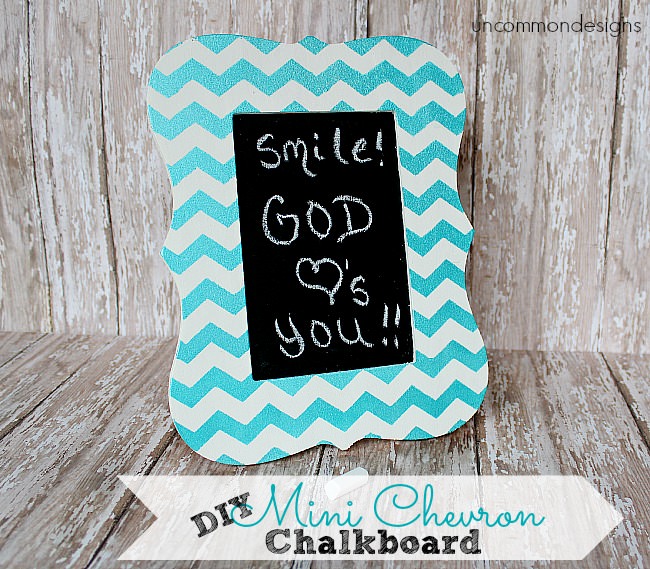
So I took her inspiration and created this little DIY Mini Chevron Chalkboard...
DIY_Mini_Chevron_Chalkboard_UncommonDesigns


It is the perfect accent for my girl and she loves leaving little messages! So let's get started...
Supplies Needed for DIY Mini Chevron Chalkboard:
DIY_Chevron_frame_supplies_uncommondesigns

1. Unfinished Wooden Picture Frame
2. Chevron Stencil { this one came from Hobby Lobby }
3. Makeup Sponge
4. White Craft Paint
5. DecoArt Dazzling Metallics Paint in Peacock Pearl
6. Americana Chalkboard Paint
7. Sponge Paint Brush
Step 1: Paint the unfinished wooden frame white and allow to fully dry.
Step 2: Stencil the chevron design onto the white frame using the metallic paint. Apply with the cosmetic sponge using a gentle up and down motion.
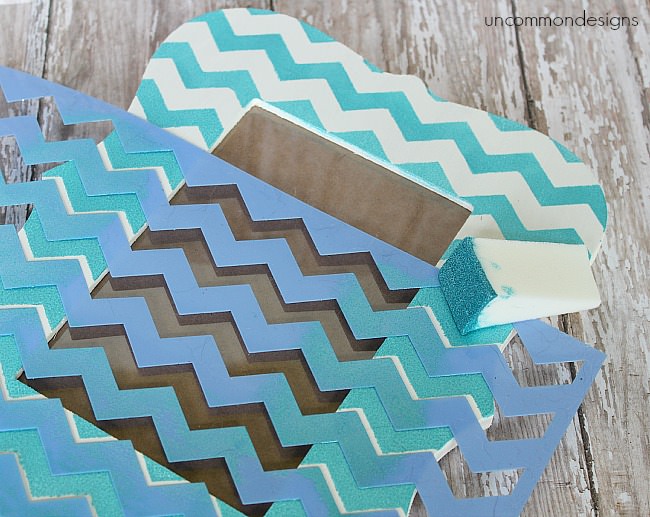
DIY_stenciled_frame_uncommondesigns


Once you have finished stenciling and allowed the frame to completely dry, you have this...
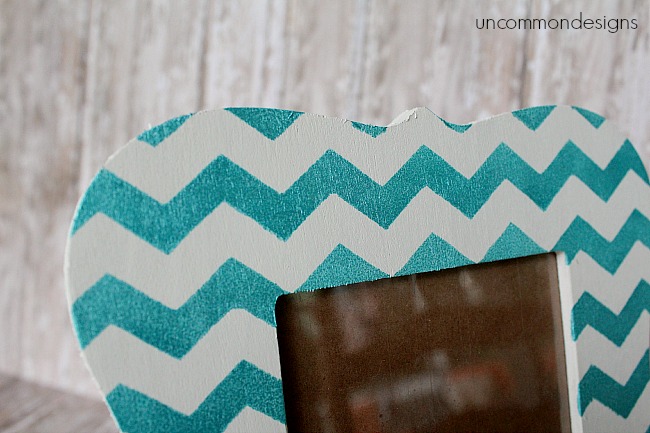
chevron_mini_chalkboard_frame_uncommondesigns

I love this Peacock Pearl color and the sparkle it has!
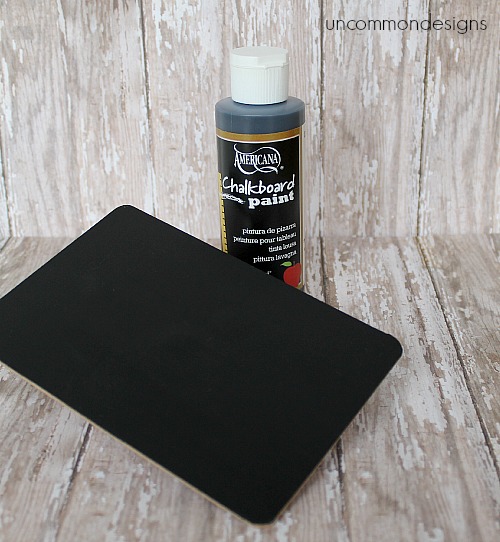
Next, I created the chalkboard part, using the center of the frame...
diy_mini_chalkboard_uncommondesigns

I simply followed the directions on the back of the Chalkboard Paint, and painted directly on the part of the picture frame that goes into the back of the frame.

HINT: Don't forget to season the chalkboard once it is completely dry, like I did on these Chalkboard Paper Tags!

Once you have seasoned the chalkboard, simply place it into the back of the frame and you are done!
My girl loves that she can use this as a chalkboard, or if she decides to put a picture in it instead, she can do that as well. 

I love that I can check off a project from my list that she has been asking for! Sweet!

DIY_Mini_Chevron_Chalkboard_UncommonDesigns

Need another great and simple project for a teen? Be sure and check out the Jewelry Organizer I made for my daughter as well.
We would love for you to come visit us over at Uncommon Designs !

A big THANK YOU to Amanda for having us over today!
Bonnie

****************
 Thank you, girls! I can't wait to get back in the saddle and start crafting and fluffing my nest again! One of these days, the stars will align and I'll have the time.

If you enjoyed this post or found it helpful, I hope you'll click your "Pin It" button to add this post to Pinterest, or a +1 for Google+. And I always appreciate kind comments.


Follow on Bloglovin

Monday, February 17, 2014

Inspiring Project Ideas {link party features}

Monday again. It's so much fun to start the week off with creative inspiration, and today I'll be sharing some Features from the weekend link party. If you're new to the blog, I take a couple of days each week to let other bloggers showcase their project ideas here, and I take a day to feature a few of my faves. We have crafts, home decor, DIY, recipes, party ideas, organizing, tips and tricks, seasonal projects, and more!

Here are some projects that caught my eye this week:

~Kids' Command Center via The Colored Door
Kids' Command Center

~Chocolate Chip Shortbread via Katie's Farm
Chocolate Chip Shortbread


~DIY Valentine Shirts via Newly Woodwards
DIY Valentine Shirts

Sunday, February 16, 2014

Showcase Your Best Post of the Week!

I hope your weekend has been wonderful. I'd love to see you at this week's Weekend Bloggy Reading link party. Hop on over to showcase your creativity if you're a blogger. Not a blogger? Don't miss all the cool "Pinable" projects! Today's the last day...it ends at 10 pm EST tonight!

If you haven't joined the fun yet, please hop over to the party and add your best post of the week. We have Home Decor, Crafts, DIY, Recipes, Tips and Tricks, Party Ideas, and so much more! Lots of fun ideas to Pin and tuck away for future use.

If you've already linked up, be sure to browse some of the other projects. If you haven't added a link back to me within your post, please take a minute to do that if you'd like your project considered for a feature. It's good for both of our SEO, guys!

Hope you have a fantastic weekend.

Follow on Bloglovin

Friday, February 14, 2014

Weekend Bloggy Reading :: Link Up!

Happy Valentine's Day! Welcome to my Weekend Bloggy Reading link party. This is the day of the week where other bloggers stop by to link up their best post of the week here at Serenity Now, and readers get to browse tons of fun project ideas. If you're new here, don't forget to "Follow" or subscribe so you don't miss future parties and projects!

*Please be sure to read my guidelines before you add a link--I've had to bypass so many great projects lately because they didn't include a link back to my blog in the post!

This party is a great place to showcase your very best post of the week (home decor, crafts, party ideas, recipes, DIY, tips and tricks, etc.) and to see what else is out there. I'm currently on "maternity leave" to enjoy our brand new baby boy, so this party is all about you guys! I will be doing my best to keep up with weekly features until I am "back in the game."

**Also, the Best of the Blogosphere will be up at Centsational Girl sometime today! Kate and I have rounded up some fab DIY to share with you as we kick off a new year full of inspiration. Head over to see the BOTB after you link up here!**


Time to link up your best post of the week!

Thursday, February 13, 2014

How to Make Decorative Pillows

Jes from Mommy Envy is here today with a quick sewing tutorial. Stay tuned to learn how to make a decorative pillow...these make great gifts throughout the year and are a great way to freshen up your decor after the holidays!
Decorative Pillows

***********************

Hello! My name is Jes and I blog over at Mommy Envy about my home, life and food. My mother-in-law makes beautiful pillows and I've always told her that one day I will have her make pillows for my house. Every time she tells me "no"! She insists that I learn myself. Which is good, I guess, but I didn't think I had the time or talent to whip up something like pillows...with cords! I made 7 pillows in one night (about 3 hours). She kept an eye on me but I made them myself and now you can too with her instructions.          

What you will need:

-Sewing machine and a zipper foot.
-Thread similar in color to the fabric you are working with.
-Fabric of choice (either the same for the pillow and cording or two contrasting fabrics
-16x16 Pillow form
-1/4 inch cording approximately 65 inches. 

Step 1.

Cut your pillow fabric. Figure out the size of your pillow and add 1 inch. I made a 16x16 pillow, so I cut a square that was 17 inches by 17 inches. This is for your ½ inch seam allowance.

Step 2.

If you are using a ¼ inch cording - Cut a 2 inch strip the length will need to be the perimeter of your pillow. Mine is 16x16 so 16 times 4 sides is 64 inches. (but always give yourself a couple more inches to make a nice finish to the cord)

Step 3.

Attach your cording to one side of your pillow (the right side). You will end up putting both squares together with the right side in.

Start with one side with the right side (what you want to show when you’re finished) You will wrap your cord with the strip and have a lip to sew it to the square. You will work your way around attaching it to the entire square.

At each corner, you will need to cut a 45 degree angle and adjust the cord so that you can turn to the next side. Each side will have a ½ inch seam allowance. 
Decorative Pillow Cording 4

Step 4.

Finishing step 3. You will need to make the finish look good because it will be seen. You will cut your cord to match up with your start. You will then cut the strip 1 inch past the end of the cord. You will fold it over and finish sewing. Decorative Pillow Cording 2

Step 5.

Attach the back of your pillow leaving a gap on one side. You will place pretty sides on the inside facing each other.

Starting where you started the cord (so that any endings are at the bottom of the pillow). Keeping the stitch close to the cording (so you don’t see awkward seem gaps), sew around the edge of the pillow until you come to the bottom of the pillow, again leaving a large gap.
Decorative Pillow Cording 3

Step 6.

Insert your pillow form or stuffing.

Step 7.

Iron the seam of your pillow so that it folds over easily. Then sew the final gap closed.

Thank you, Amanda, for letting me hang out here today! I started Mommy Envy for two reasons. One, because I've always wanted to be a writer and I had to finally do something for myself. The second reason is because I think all moms have moments when they feel inadequate and weighed down. I know I do! I sometimes show pictures of my messy house, not that it makes you feel any more adequate than me. My posts try to encourage you to go after your dreams and to hopefully help out with tips in areas you don't want to excel at (like the laundry!).

******************************

Thanks, Jes, for showing us how it's done!

You can catch up with Jes at her blog, Mommy Envy. Be sure to stop by and say "hello!"


If you enjoyed this post or found it helpful, I hope you'll click your "Pin It" button to add this post to Pinterest, or a +1 for Google+. And I always appreciate kind comments.


Follow on Bloglovin

Wednesday, February 12, 2014

Simple Washi Tape DIY Cards

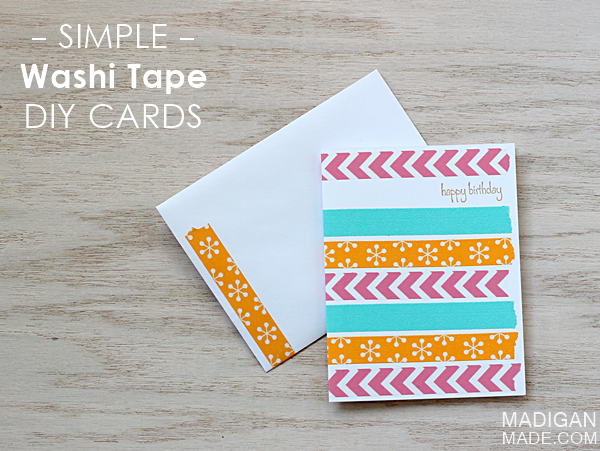
Handmade cards are always such a thoughtful gesture, don't you think? Shannon from Madigan Made has some of the coolest creative projects out there, and she agreed to stop by the blog today and show us some simple ideas for making your own greeting cards and using washi tape to embellish. Fun, huh? Please help me welcome Shannon to the blog!

*****************************


Hi! My name is Shannon and I blog at Madigan Made… where creative living is made simple.


And I should tell you that I’ve been called the Clark Kent of craft blogging. Why? Well, by day I work as a pharmacist and by night I try to help my readers find easy and elegant solutions for their home.  I love to blog about simple crafts, DIY décor and easy recipes. I’m delighted to be here to chat with you today so that Amanda can spend more time with her new baby.

How do you make your gift giving and holidays special? 

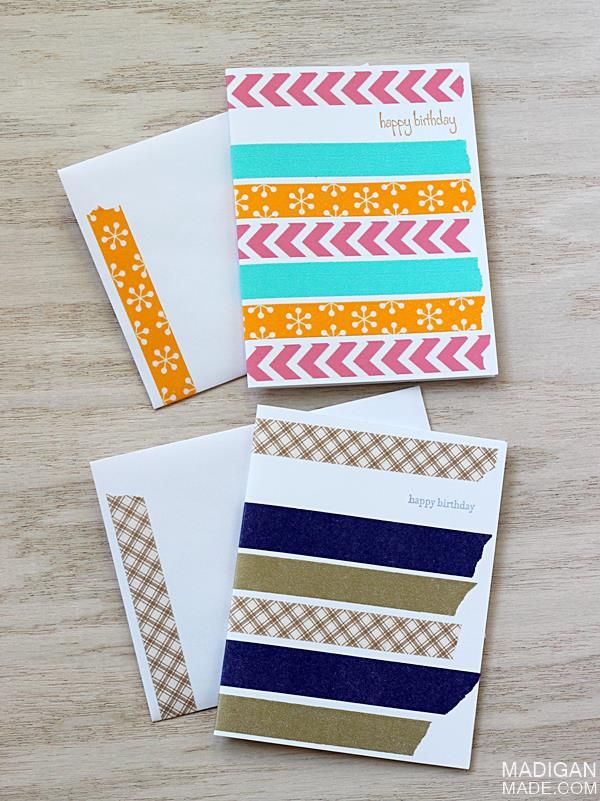
I’m a big fan of handing out handmade greeting cards… but I also strive to keep the card making process simple. (I love simple!) I enjoy showing my readers how easy it is to make handmade cards… and washi tape is one of the easiest ways to decorate a card. I made these cute cards recently and thought I’d share with you how I made them. It is really simple.

Easy Handmade Washi Tape Card

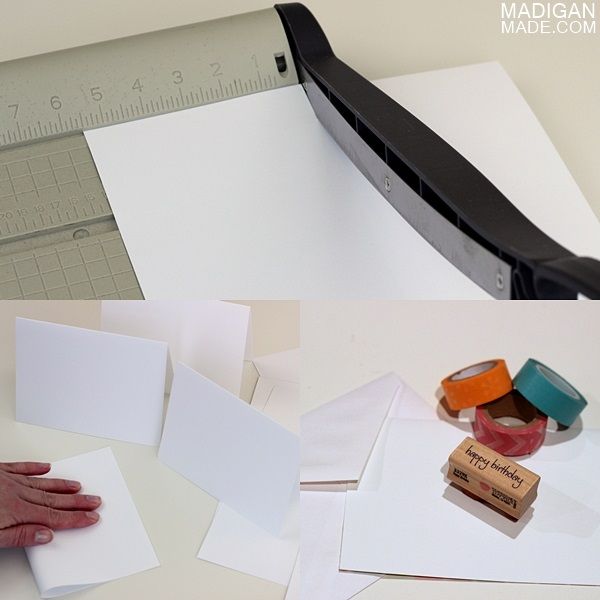
Supplies needed:

  • White card stock (8.5” x 11”)
  • Invitation size envelopes
  • Paper cutter
  • Washi tape, various patterns
  • Small stamp with greeting
  • Stamp pad
  • Scissors

Instructions:

First, cut your cardstock in half so you have two sheets that are 5.5” x 8.5”. Fold that piece in half to create a card.


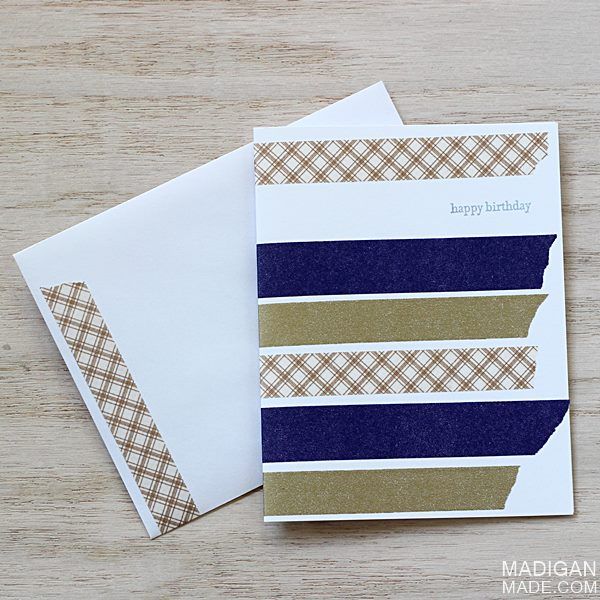
Then you just need to decorate your card using the washi tape. You can get creative with different patterns and colors… but I am partial to stripes! Just apply the tape and trim the ends neatly with scissors (or rip the tape if you like that look).

Stamp an open area of the card front with your greeting. Don’t forget to decorate your envelope, too! The folded card should fit perfectly inside.

Give your cute card to the recipient and tell them that, yes, you made it! (just don’t tell them how easy it was to make!)


I love that you can change the look and theme of the card just by switching out the colors and patterns of tape you are using. You can make one for any holiday or occasion!

If you wanted more ideas for simple, creative living, I’d be delighted if you joined me on Madigan Made or followed me on Pinterest, Facebook or Twitter!

- Shannon

***********************

Thanks, Shannon! I love how easy it is to customize this project. Oh, the possibilities!!

If you enjoyed this post or found it helpful, I hope you'll click your "Pin It" button to add this post to Pinterest, or a +1 for Google+. And I always appreciate kind comments.

Follow on Bloglovin

Tuesday, February 11, 2014

4 Inexpensive Updates for Your Home Decor

Winter can be a tough time for decorating. You may crave simplicity after all the glitz and glamour of the holidays, but it's still fun to dress things up! Samantha from Crafty Texas Girls is here today to share a few Inexpensive Updates for Your Home Decor.
*****************************
With the holidays over, now is a good time to spruce up and re-evaluate your home decor. With Christmas decor down, take a look, really take a look at your home. See what is working, move things around, reorganize, and make a shopping list. Most of us are on a budget- but even with limited funds, it is possible to update your home and give it a new feel.

Here are few things I have updated in my home recently. Maybe it will inspire you!


1. Throw Pillows! I found two new pillows at Home Goods. I liked the print, color, and size. Can't beat down pillows for $20 each. I change out my pillow so often, to me they are like jewelry. I don't ever 'throw them away'. Instead,  I rotate them from couch to chair or from room to room. Pair prints with different solids for a new look.


2. New Accessories- Just like a statement necklace can dress up a white t-shirt, a few new home goods can transform a room. I am liking gold more and more. I found a gold plate at Home Goods and mixed it with some mercury glass. That gold frame is from Goodwill--it just has a new coat of spray paint. I will probably end up moving it to the mantle when Christmas rolls around. And then putting my coffee filter wreath in its place.


A new vase, flowers, frames, books, baskets, and yes- even a horse head- can pack a lot of bang for the buck.


3. A Rug- How have I lived in Texas this long without a cowhide rug?! The cream sheepskin rug from Ikea, which I adored, was getting really worn. My Ikea doesn't seem to be carrying them anymore, so I came home with cow hide instead. I was a bit unsure about it at first, but now I am really loving it. It is surprisingly soft and really easy to vacuum. No matter the budget, a rug can really transform a room. Check places like Overstock.com for deals and steals on your favorite styles. Look for interesting texture (sisal, shag, fur) or a great pattern (floral, lattice, chevron).


4. A little paint- Don't 'love' something in your home? Try painting it! Our coffee table and side table was originally a yellow-pencil wood color. When I started re-decorating our home, I felt those tables had to go. Wrong! A coat of black paint helped them fit in perfectly with the new design scheme. Same goes for frames, lamps and chair legs. Gold, black, white, grey-- a little paint can make things you already own feel new again.


What would you like to update in your home? Got any ideas for 'cheap/chic' transformations?

 Like this post?
Subscribe to crafty texas girls

Keep in Touch with Crafty Texas Girls
Facebook | Instagram | Pinterest | Twitter | Blog | Shop 

************************
I just love Samantha's home, don't you?


If you enjoyed this post or found it helpful, I hope you'll click your "Pin It" button to add this post to Pinterest, or a +1 for Google+. And I always appreciate kind comments.


Follow on Bloglovin
Related Posts Plugin for WordPress, Blogger...