Thursday, November 21, 2013

DIY Stenciled Drop Cloth Table Runner

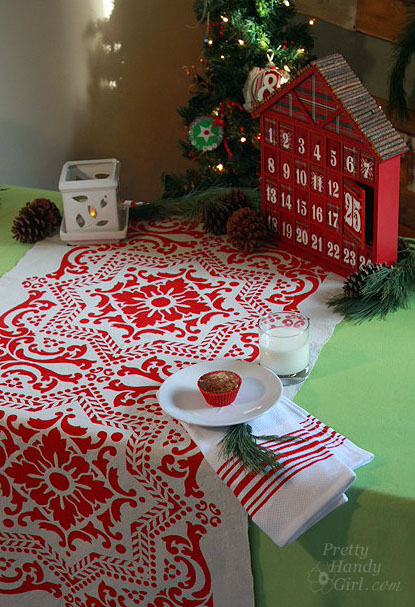
I fell in love with today's craft tutorial when I first saw it. Brittany from Pretty Hand Girl is going to show us how to make a beautiful stenciled table runner. This project could easily be tailored to any holiday or event. Please help me welcome Brittany to the blog today!
*******************************
DIY Stenciled Drop Cloth Table Runner
{Guest Post by Pretty Handy Girl}

Hi y'all! I'm Brittany, aka Pretty Handy Girl. Normally I'm serving up DIY tutorials on my blog, PrettyHandyGirl.com, but today I'm honored to be guest posting for Amanda. With the holidays fast approaching, you might be looking for some great DIY gift ideas for those tough to shop for people on your gift list.

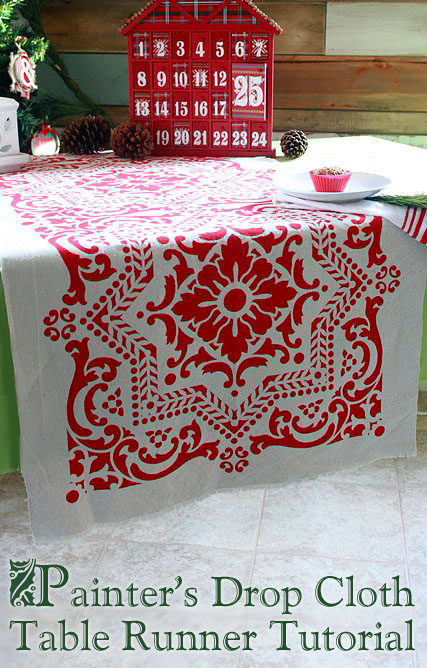
These stenciled table runners are just the ticket for anybody who likes to host parties or just make their table look festive. I'll show you how to make this super easy table runner using a painter's drop cloth and sample paints. And you'll have plenty of leftover cloth to make three more!
                           DIY Stenciled Drop Cloth Table Runner


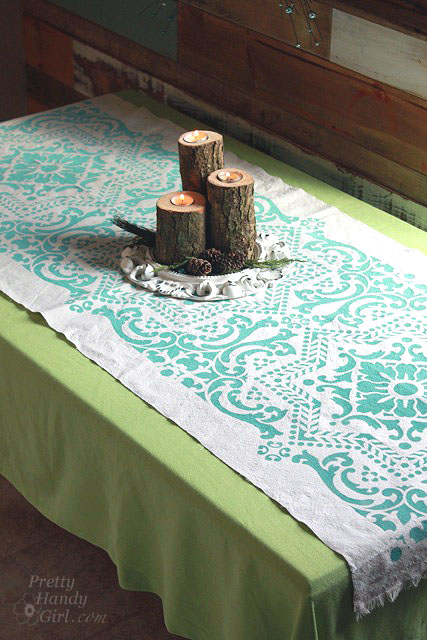
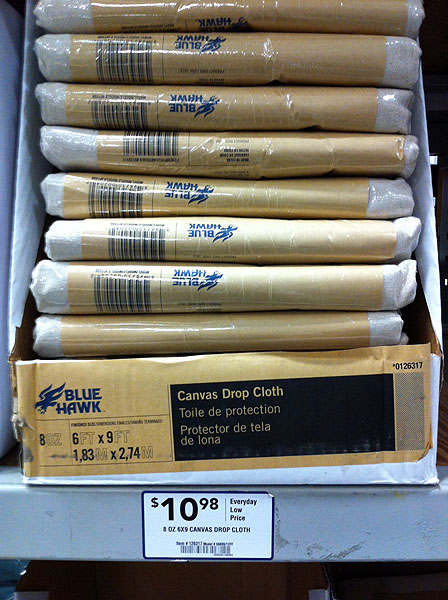
You can purchase almost all of the supplies at your local home improvement store (I got my supplies at Lowe's.) The cloth is cut from a canvas drop cloth that was folded into fourths. To make them look and feel more like french grain sack material, the drop cloths are washed 2-3 times in the washer with bleach added to the cycle. The result is a lighter and softer canvas that mimics linen.
                       painters drop cloth


 I used some leftover latex paint for two of my runners. Plus, I bought a sample of Valspar paint in "Bright Red" for the red one.
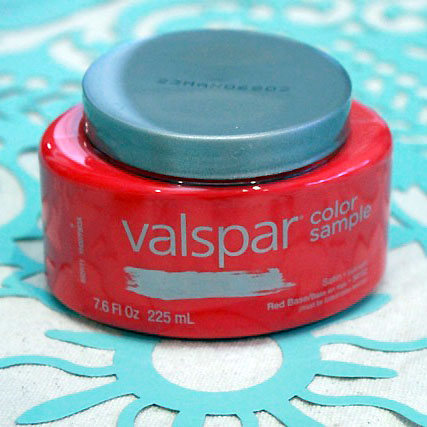
                           

Each sample jar holds enough paint to print two runners.

   
Materials: DIY Stenciled Drop Cloth Table Runner
  • 9-ft x 6-ft 8 oz. Canvas Drop Cloth - pre-washed and cut into four 27" x 6' strips
  • 8 oz Paint Sample
  • 4-in Cabinet/Door Foam Roller
  • Paint tray
  • Royal Studio Design Stencil - Lisboa (You don't have to use a stencil, use what you have. Or tape off stripes with painter's tape!)
  • Painter's Tape
  • Wet wipes
Instructions:

Cut your drop cloth into four lengths measuring 27" x 6' long. Fray the edges of the canvas runners. Trim any long threads.
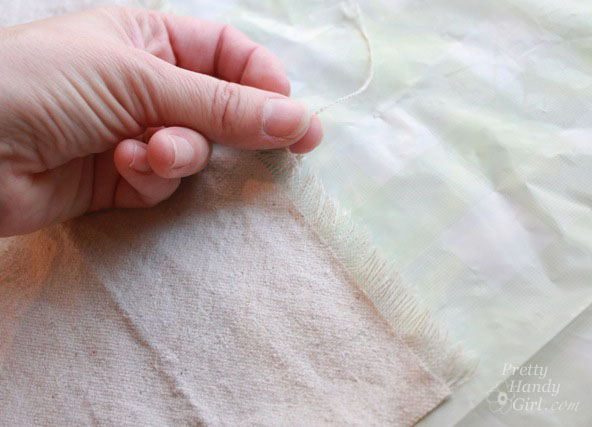

Fold the canvas runner in half length-wise and iron the fold. Open up the runner, fold it in half width-wise and iron the fold. This will give you a center mark to line your stencil up with. DIY Stenciled Drop Cloth Table Runner
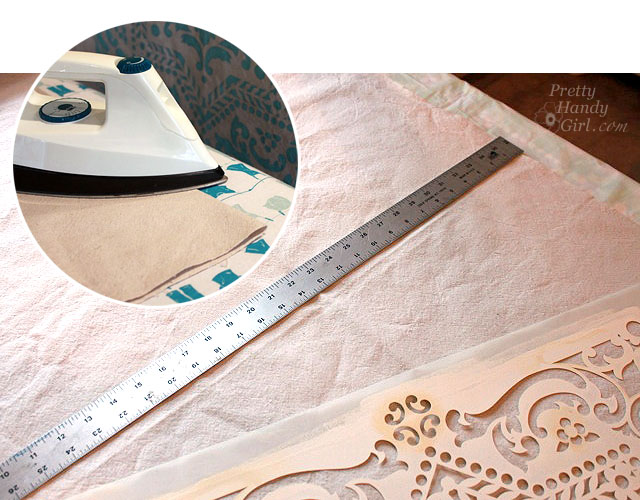

Line up the stencil on the center creases. Put a piece of painter's tape on each corner to hold the stencil in place. DIY Stenciled Drop Cloth Table Runner
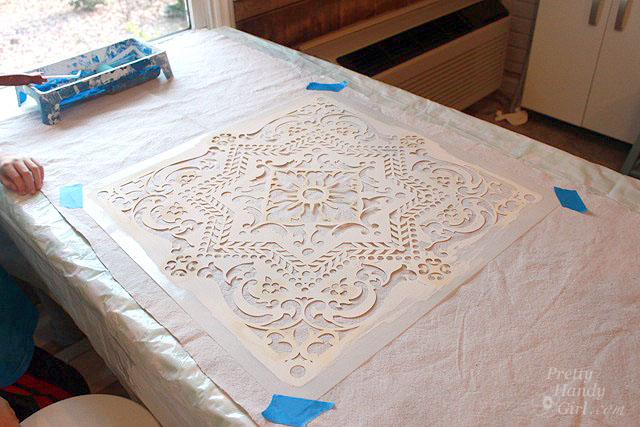

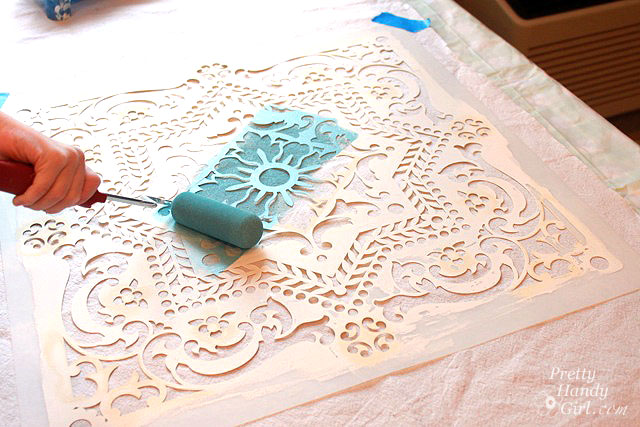
Roll the foam roller into the paint and roll off any excess. Paint over the entire stencil being sure to get equal coverage and not to run over the edge of the stencil.

Carefully lift the stencil up and off the runner. DIY Stenciled Drop Cloth Table Runner
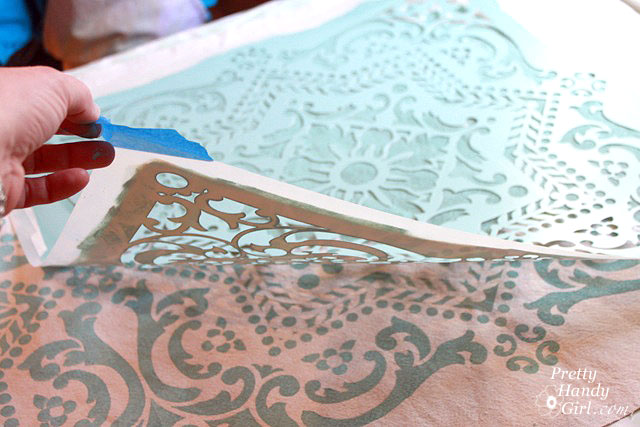

Line the stencil up next to the first print. Make sure the stencil overlaps correctly. DIY Stenciled Drop Cloth Table Runner


Roll paint over the entire stencil again. DIY Stenciled Drop Cloth Table Runner
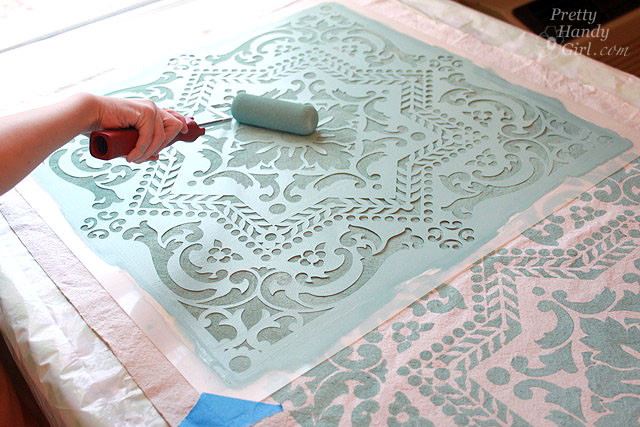

Repeat on the other side of the first stencil print. Three Lisboa stencil prints should fit perfectly on the runner. DIY Stenciled Drop Cloth Table Runner
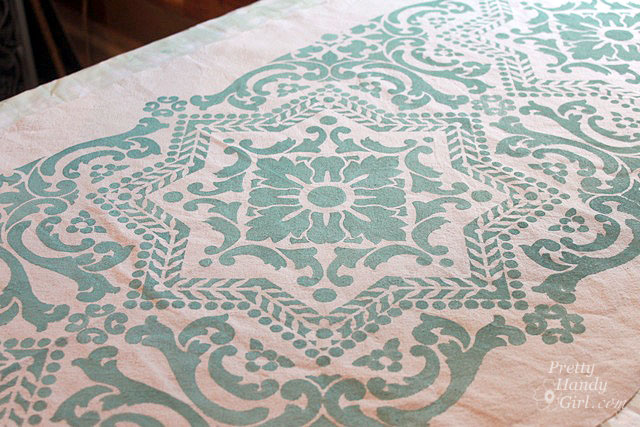

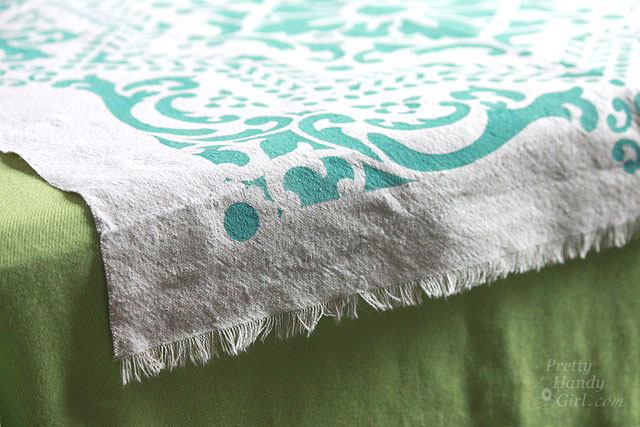
After the paint has dried, you may wash the runner again to soften the paint. The edges will fray a little more, but I tend to like that look. If you don't want the runner to fray you could turn the edges under and sew a seam. DIY Stenciled Drop Cloth Table Runner

The blue runner would fit in nicely with New Year's Eve or Easter decorations. DIY Stenciled Drop Cloth Table Runner
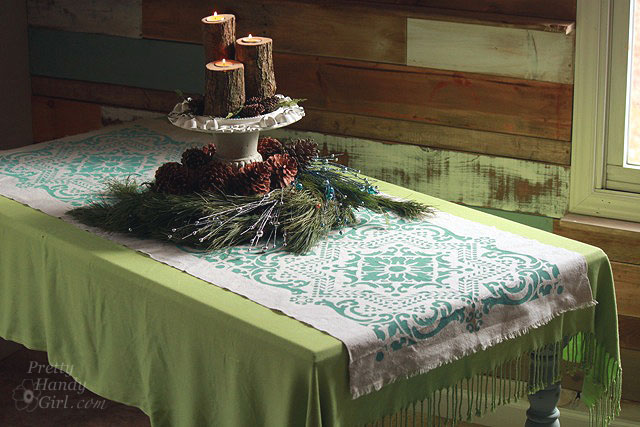

I'm in love with these runners. They are so pretty that I want to keep them for myself. Which color do you like best? Blue...or red?
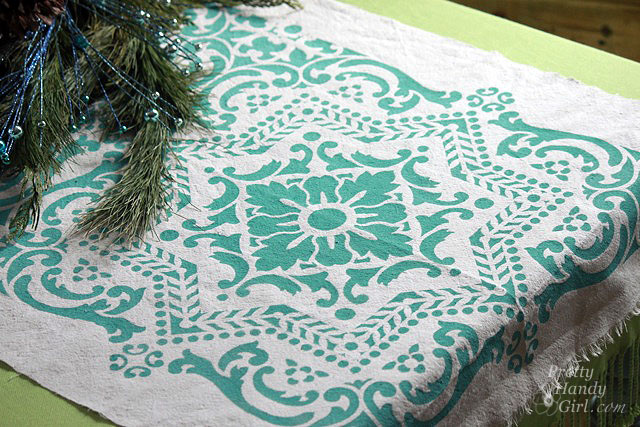
DIY Stenciled Drop Cloth Table Runner
                             DIY Stenciled Drop Cloth Table Runner  


Did you like this tutorial? If you want more DIY gift ideas that won't break your budget, you'll want to check out my Très Frugal series, running all November.
                    Tres-frugal-party

 I'm joined by a few blogger friends to bring you 30 days of DIY gift tutorials!

  PHGFancySign
***************

Thank you, Brittany! I can't wait to try this one out on my own.

What's your favorite way to dress up your table for the holidays?

If you enjoyed this post or found it helpful, I hope you'll click your "Pin It" button to add this post to Pinterest, or a +1 for Google+. And I always appreciate kind comments.


Follow on Bloglovin

Wednesday, November 20, 2013

Homemade Fried Ice Cream Recipe

Today I'm welcoming Rachel from R and R Workshop. She has a delicious recipe for Homemade Fried Ice Cream to share with us today. What a hit this would be as a special edition to your Thanksgiving or Day-After-Thanksgiving menu. I'd also like to ask for a few prayers...today is my amnio to see if baby's lungs are ready for him to come on Friday. You can look for announcements and updates on my Facebook page, Twitter, or Instagram! He'll be here soon!
*****************************


I'm Rachel from R and R Workshop. So excited to be here today!

This recipe is a favorite in my family! 
The first time I tried it was years ago and I still love it. 
We call it fried ice cream- but its not fried. 
It is super easy to make- which is a plus in my book! :)

HOMEMADE FRIED ICE CREAM
By R and R Workshop

Ingredients:
2 cups Honey Bunches of Oats
1 cup brown sugar
3/4 stick of butter
1 carton Vanilla Ice Cream

Instructions:
1.Cover bottom of a 9x13 pan with ice cream- use the whole carton.
2. Melt butter on stove. Add brown sugar.
2. Add 2 cups of Honey Bunches of Oats to the sugar mixture. 
3. Pour over Ice cream. 
4. Put your pan into the freezer for 2 hours to harden.
5. Enjoy!


I hope you try it!
Such a yummy treat to take to a party or family gathering as well.

I hope you stop by R and R Workshop for more Recipes, DIY Projects, & Home Decor ideas.

Thanks, Amanda for having me here at Serenity Now!
**********************************************

Doesn't that look amazing? Thanks for sharing the recipe with us, Rachel!

If you enjoyed this post or found it helpful, I hope you'll click your "Pin It" button to add this post to Pinterest, or a +1 for Google+. And I always appreciate kind comments.


Follow on Bloglovin

Tuesday, November 19, 2013

Apple Pie with Crumb Topping (Easy Fall Dessert Recipe)

The women's ministry at my church puts together a super-fun event each Fall. Ladies stop by and socialize while they assemble apple pies. The pies can be baked right away or frozen and baked later. We made them once years ago at MOPS too, and they were a real crowd-pleaser. I had to miss this year due to sick kids, but I was able to pick up the ingredients and put my pies together at home. This recipe for Apple Pie with Crumb Topping is, hands down, one of the best I've ever tasted!
Apple Pie with Crumb Topping (Easy Fall Dessert Recipe) from Serenity Now


I should also state that I am firmly part of the camp that believes it's not really dessert unless there is chocolate in it. So for me to give this pie such rave reviews means it must be good!

Ingredients:
1 unbaked, deep dish pie shell
4 to 6 large tart apples
1/3 cup sugar
1 tsp. cinnamon
1/4 tsp. nutmeg
1/4 tsp. salt

Crumb Topping
1/2 cup sugar
3/4 cup flour
1/3 cup butter

Directions:

1. Peel and core your apples.
2. Place sliced apples (I also did one pie with apples I chopped up) into pie shell.
3. Mix the sugar, cinnamon, nutmeg, and salt well. Sprinkle over the applies.
4. For the crumb topping, mix the sugar and flour. Cut in butter.
5. Press crumb topping over apples.
6. Place on a metal cookie sheet and bake for about 50 minutes.

*Note: You can make this pie ahead and freeze in a large ziploc bag. My friend Michelle suggested coverng the pie with foil for the first and baking at the regular temp for 30 minutes, and then removing the foil to bake an additional 40 to 50 minutes until brown and bubbly. This worked like a charm.

I like to serve slices with a nice serving of vanilla ice cream and some caramel sauce drizzled on top. This slice is a little flat because it was the last piece left...the rest of the pie was devoured!
Apple Pie with Crumb Topping (Easy Fall Dessert Recipe) from Serenity Now


With baby most likely on the way this week, I have two pies waiting in my freezer for Thanksgiving. It will be a relief to just pop one in the oven and grab a carton of Breyer's before heading over to the in-laws' for the big meal. You can't get much easier than that!

What's your favorite pie flavor?


If you enjoyed this post or found it helpful, I hope you'll click your "Pin It" button to add this post to Pinterest, or a +1 for Google+. And I always appreciate kind comments.


Follow on Bloglovin

Monday, November 18, 2013

Inspiring Project Ideas {link party features}

Hello, and Happy Monday! If all goes well with my amnio on Wednesday, I could have a baby boy by Friday afternoon. This week is filled with racing to get things cleaned and organized in the house, but today is a Features Day from the weekend link party. There was a fantastic line-up of creative posts: Home Decor, DIY, Crafts, Recipes, Party Ideas, Tips and Tricks, and more. It's an awesome spot to find stuff to add to your Pinterest boards! Here are some that I spotted this weekend:

Sunday, November 17, 2013

Showcase Your Best Post of the Week - Link Up!

Good morning! I hope your weekend has been pleasant. I've been crafting up a storm, and have just about finished all the homemade art pieces for baby's nursery. Just wanted to remind you that there is one more day to link up to this week's Weekend Bloggy Reading link party. I'd love to see you there! I'll have a post with some Featured Project Ideas up tomorrow.

If you haven't joined the fun yet, please hop over to the party and add your best post of the week. We have Home Decor, Crafts, DIY, Recipes, Tips and Tricks, Party Ideas, and so much more! Lots of fun ideas to Pin and tuck away for future use.

If you've already linked up, be sure to browse some of the other projects. If you haven't added a link back to me within your post, please take a minute to do that if you'd like your project considered for a feature. It's good for both of our SEO, guys!

Hope you've had a fantastic weekend.


Follow on Bloglovin

Friday, November 15, 2013

Weekend Bloggy Reading :: Link Up!

Happy Friday! I'm ready for the weekend, how about you? Welcome to my Weekend Bloggy Reading link party. This is the day of the week where other bloggers stop by to link up their best post of the week, and readers get to browse tons of fun project ideas. If you're new here, don't forget to "Follow" or subscribe so you don't miss future parties and projects!

Please be sure to read my guidelines before you add a link--I've had to bypass so many great projects lately because they didn't include a link back to my blog in the post!

This party is a great place to showcase your very best post of the week (home decor, crafts, party ideas, recipes, DIY, tips and tricks, etc.) and to see what else is out there.

Here are a few of my faves I spotted around the web this week:

sources listed below


~IKEA Hemnes Hack via Made 2 Style

~Reading Nook with PVC Pipe Ladder via everyday organizing

~Cranberry Centerpiece via Madigan Made

~Under-Cabinet Tablet and Recipe Book Holder via Sawdust and Embryos


~And Me? I'd love it if you have a moment to click over. This week featured:
Time to link up your best post of the week!

Thursday, November 14, 2013

DIY Toddler Superhero Scarf (Sewing Tutorial)

Michele from The Scrap Shoppe is swinging by the blog today with a simple sewing tutorial for us. You can learn how to make your own version of this cutie Toddler Superhero Scarf. Isn't the model adorable? I can't believe I'll be playing superheros, soldiers, and dinosaurs before too long! This would be a great project to tackle if you need some alone crafty time over the Thanksgiving holiday...and what a cute Christmas gift or stocking stuffer.
***********************

Hi guys! I'm excited to be here filling in for Amanda while she prepares for her new bundle of joy. And since #3 is an adorable baby boy, I thought a boy project was in order! I have a fairly simple sewing project for you. 
A toddler superhero scarf!

By the way, I am Michele and I create over in my little corner of the world at The Scrap Shoppe.
I dabble in a little bit of everything... paper crafts, jewelry, home decor - I'm a but eclectic when it comes to crafting! And, you should know, I'm new to the world of sewing. This is my 4th project and I think I'm well on my way to sewing up a storm! I also have two little boys that I love to create for.

Have you ever noticed that its not easy to find scarves for your toddler? Hats, gloves... easy peasy. But scarves seem to be a bit scarce. I decided it was time to remedy that and make some!

I love to peruse the fabric remnants at my local craft stores. Its a great way to get pricey fabrics at bargain basement prices. Lately I've been collecting quite a bit of superhero fabric.  My boys love superheroes!

And this flannel superhero fabric was the perfect thing to make into scarves.

Disclaimer: I know I am mixing the DC and Marvel Comic characters. If you're a comic book guru, please do not hold this against me. My boys are young and to them a superhero is a superhero. We embrace them all! ;)

These are the basic directions I created to make the scarves. I'll walk you through the process in the following pictures, but this has everything all in one place.

After measuring one of my own scarves on my 5 year old, I determined that 38" was a great length for a toddler scarf. The width is negotiable. I chose 6" because of the print on my fabric.
Select the material you want to use for this project. I wanted something that would be warm so I went with flannel. The yellow flannel was leftover from my boys' TMNT Halloween costumes. Using a solid color for the ends of the scarf will make it easier to add and see the monogram we will be adding to it later.

Cut your material: 
1 piece at 33" x 13"
2 pieces at 4" x 13"

Stitch together the 3 pieces of material with the shorter pieces at each end of the long piece allowing for a 1/2" seam. 

Fold the material in half, with the backside of the material facing the outside (wrong side out).
Sew along the long end and top of the scarf with a 1/2" seam. Do not sew closed the bottom of the scarf.

Pull the scarf right side out through the bottom of the scarf. Iron to smooth the edges.

Fold the bottom of the scarf under for a 1/2" seam. Iron smooth.

If you are going to add a monogram to the scarf, now is the time to do it before we close the scarf up.
I made a freezer paper stencil monogram using Paul's Super Font. 

First, I printed out the letters on cardstock in the appropriate size. Cut those letters out as they will be act as our stencil. On the rough side of the freezer paper trace the stencil. Cut out the stencil keeping the negative pieces. Place the freezer paper smooth-side-down on your scarf and iron on. The freezer paper will seal itself to the material creating a stencil for painting the monogram. 

Place something such as cardboard or extra freezer paper between the top piece of fabric and the bottom and use basic acrylic paint for the monogram. Once the monogram is dry, peel off the freezer paper.
You can also choose to embroider or iron on a letter for the monogram.

Once the paint is dry, apply a 1/4" topstitch around the edges of the scarf. Depending on the size of your monogram, you may stitch over it. If that is the case, use a toothpick or Q-tip to paint the stitches on the monogram.

The scarf is now ready for your little superhero!

My little guy is SUPER excited about his new scarf! And it was such a breeze to put together that I made extra ones for Christmas gifts for the other little guys in my life.

I'm happy that my little guy loves his new scarf so much AND that I can keep him extra warm this winter.
Win-win!
Thanks so much for having me over, Amanda! Enjoy that beautiful little boy!

Y'all come visit me sometime. I would love to have you over!
*****************************

Thanks, Michele! I seriously can't get over his sweet little grin! This scarf would be an awesome handmade gift for a cute little boy in your life.

If you enjoyed this post or found it helpful, I hope you'll click your "Pin It" button to add this post to Pinterest, or a +1 for Google+. And I always appreciate kind comments.

Follow on Bloglovin
Related Posts Plugin for WordPress, Blogger...